
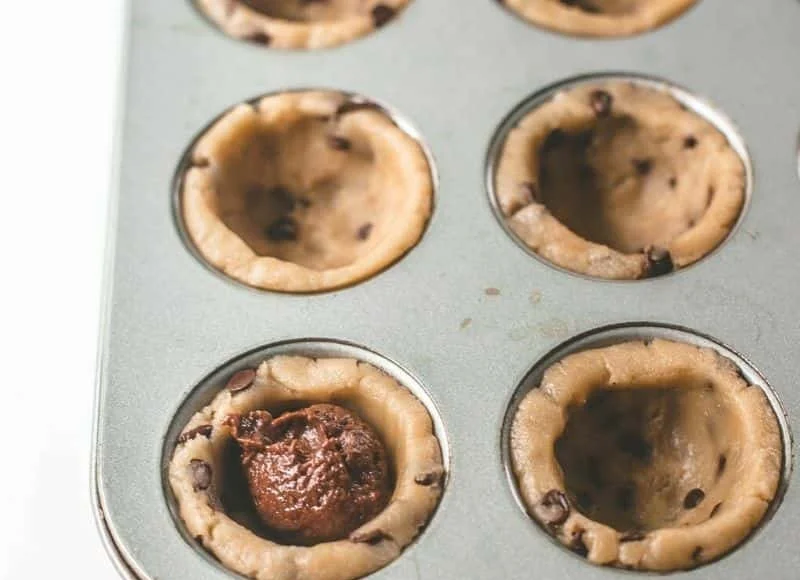
It was one of those chilly afternoons when the world outside felt mesmerizingly calm, yet my cozy kitchen buzzed with excitement. The aroma of melting butter wafted through the air, wrapping its warmth around me like a soft blanket. It was the perfect moment to whip up a batch of Chocolate Chip Brownie Tarts. These little indulgences are not just any dessert; they’re a love letter to anyone who craves the rich, gooey goodness of brownies but in a delightful tart shell. There’s something magical about dessert that fits perfectly in your hand, ready to be enjoyed in just a few bites. With every scoop of brownie batter, I could already envision smiles and little hands reaching out for one (or two) of these sweet treats.
Recipe Timing
- Prep Duration: 15 minutes
- Active Cooking: 22 minutes
- Total Duration: 37 minutes
- Portion Size: 12 tarts
- Complexity: Simple
Nutritional Recipe
- Calories per portion: Approximately 280
- Protein: 3 grams per serving
- Carbs: 34 grams per serving
- Fats: 16 grams per serving
- Fiber: 1 gram per serving
- Sugars: 22 grams per serving
- Sodium: 150 mg per serving
Why You’ll Love This Chocolate Chip Brownie Tarts
These Chocolate Chip Brownie Tarts are the ideal dessert for anyone who appreciates the harmony of chocolate flavor and a unique texture. The flaky tart shell contrasts beautifully with the fudgy brownie filling, making each bite a celebration. Whether it’s a weekend gathering, a birthday party, or simply a way to elevate your evening snack, these tarts are sure to impress. Plus, they’re perfectly sized—no forks or plates needed, just pure indulgence!
The Complete Cooking Journey
Grab your mixing bowls and preheat your oven; we’re about to embark on a delicious adventure! The process is simple yet satisfying, ensuring a lovely aromatic escape from the everyday hustle. Each step invites a new layer of richness to the tarts, culminating in a final product that is as delightful to look at as it is to eat.
Ingredients:
- 1 cup butter, melted
- 2 cups granulated sugar
- 4 large eggs
- 1 teaspoon vanilla extract
- 1 cup all-purpose flour
- 1/2 cup unsweetened cocoa powder
- 1/2 teaspoon salt
- 1 cup chocolate chips
- 1 package tart shells
Method:
Step 1: Preheat the Oven
Preheat the oven to 350°F (175°C). This will ensure that your tarts bake evenly and come out perfectly!
Step 2: Mix Butter and Sugar
In a mixing bowl, combine melted butter and granulated sugar until smooth. The warmth of the butter and sweetness of the sugar meld together beautifully here.
Step 3: Add the Eggs
Add eggs one at a time to the butter-sugar mix, mixing well after each addition. This step is crucial for incorporating air and achieving that lovely, fluffy texture.
Step 4: Stir in Vanilla
Stir in the vanilla extract, allowing its rich aroma to infuse into the batter, creating a delightful base for your brownies.
Step 5: Combine Dry Ingredients
In a separate bowl, mix together the all-purpose flour, cocoa powder, and salt. This ensures that the cocoa is evenly distributed, avoiding any bitter clumps in your tarts.
Step 6: Combine Wet and Dry Mixtures
Gradually add the dry ingredient mixture to the wet ingredients, stirring until well combined. The rich, chocolatey batter will begin to form, and it will be hard not to sneak a taste!
Step 7: Fold in Chocolate Chips
Gently fold in the chocolate chips, ensuring they’re scattered throughout the batter for pockets of melty goodness.
Step 8: Fill Tart Shells
Spoon the brownie batter into the prepared tart shells, filling each just below the rim to allow them to rise perfectly during baking.
Step 9: Bake
Bake for about 18-22 minutes, or until a toothpick inserted in the center comes out with a few moist crumbs. The excitement builds as the aroma envelopes your kitchen!
Step 10: Cool
Let the tarts cool for a few minutes before serving. This will help them set and makes it easier to remove them from the tart shells without breaking.
Serving Suggestions & Pairings
Serve these delightful tarts with a dollop of whipped cream or a scoop of vanilla ice cream on the side for contrast. They also pair beautifully with a rich coffee or a glass of cold milk, adding to that nostalgic brownie enjoyment.
Storage & Leftovers Guide
Store any leftovers in an airtight container at room temperature for up to three days. If you want to keep them longer, you can refrigerate them for up to a week. Just warm them slightly in the microwave before serving to restore that freshly baked feel.
Kitchen Wisdom & Success Tips
- Ensure your butter is fully melted but not hot when mixing with sugar to avoid cooking the eggs.
- Want to elevate flavors? Add a pinch of espresso powder to deepen the chocolate taste.
- For a more intense chocolate experience, consider using dark chocolate chips or swapping half of the granulated sugar for brown sugar.
Flavor Variations & Adaptations
Feeling adventurous? Try adding nuts like walnuts or pecans for added texture or swirling in a tablespoon of peanut butter into the batter before baking. You can also replace the chocolate chips with butterscotch or white chocolate chips for a unique twist!
Reader Questions & Solutions
-
Why are my tarts sinking in the middle?
Make sure not to overmix your batter after adding the flour, as this can lead to dense tarts that collapse. Also, ensure your baking powder is fresh! -
Can I freeze these tarts?
Absolutely! Once they have cooled completely, wrap them tightly in plastic wrap and store in an airtight container for up to three months. -
What can I use instead of tart shells?
You can use mini muffin tins or tart pans. Just adjust the baking time based on the size of your containers. -
How do I prevent my tarts from sticking?
Make sure to lightly grease your tart shells or use parchment paper for easy removal. -
Can I make this batter ahead of time?
Yes! You can prepare the batter in advance and store it in the refrigerator for up to 24 hours before filling the tart shells and baking.
Wrapping Up
There you have it—Chocolate Chip Brownie Tarts that are sure to become a beloved favorite in your home! Their rich chocolatey goodness and just-right sweetness make them a perfect treat for any occasion. So grab your mixer, preheat your oven, and dive into the joy of baking. You’re not just making tarts; you’re creating cherished memories one delicious bite at a time! Happy baking! 🍫✨
PrintChocolate Chip Brownie Tarts
Delightful chocolate chip brownie tarts in a flaky shell, perfect for any occasion.
- Prep Time: 15 minutes
- Cook Time: 22 minutes
- Total Time: 37 minutes
- Yield: 12 tarts 1x
- Category: Dessert
- Method: Baking
- Cuisine: American
- Diet: Vegetarian
Ingredients
- 1 cup butter, melted
- 2 cups granulated sugar
- 4 large eggs
- 1 teaspoon vanilla extract
- 1 cup all-purpose flour
- 1/2 cup unsweetened cocoa powder
- 1/2 teaspoon salt
- 1 cup chocolate chips
- 1 package tart shells
Instructions
- Preheat the oven to 350°F (175°C).
- Mix butter and granulated sugar until smooth.
- Add eggs one at a time, mixing well after each addition.
- Stir in the vanilla extract.
- Combine flour, cocoa powder, and salt separately.
- Gradually add dry ingredients to wet, stirring until combined.
- Fold in chocolate chips.
- Fill tart shells with brownie batter.
- Bake for 18-22 minutes, until a toothpick comes out with moist crumbs.
- Cool for a few minutes before serving.
Notes
Serve with whipped cream or vanilla ice cream. Store leftovers in an airtight container for up to three days or refrigerate for up to a week.
Nutrition
- Serving Size: 1 tart
- Calories: 280
- Sugar: 22g
- Sodium: 150mg
- Fat: 16g
- Saturated Fat: 9g
- Unsaturated Fat: 7g
- Trans Fat: 0g
- Carbohydrates: 34g
- Fiber: 1g
- Protein: 3g
- Cholesterol: 155mg


