
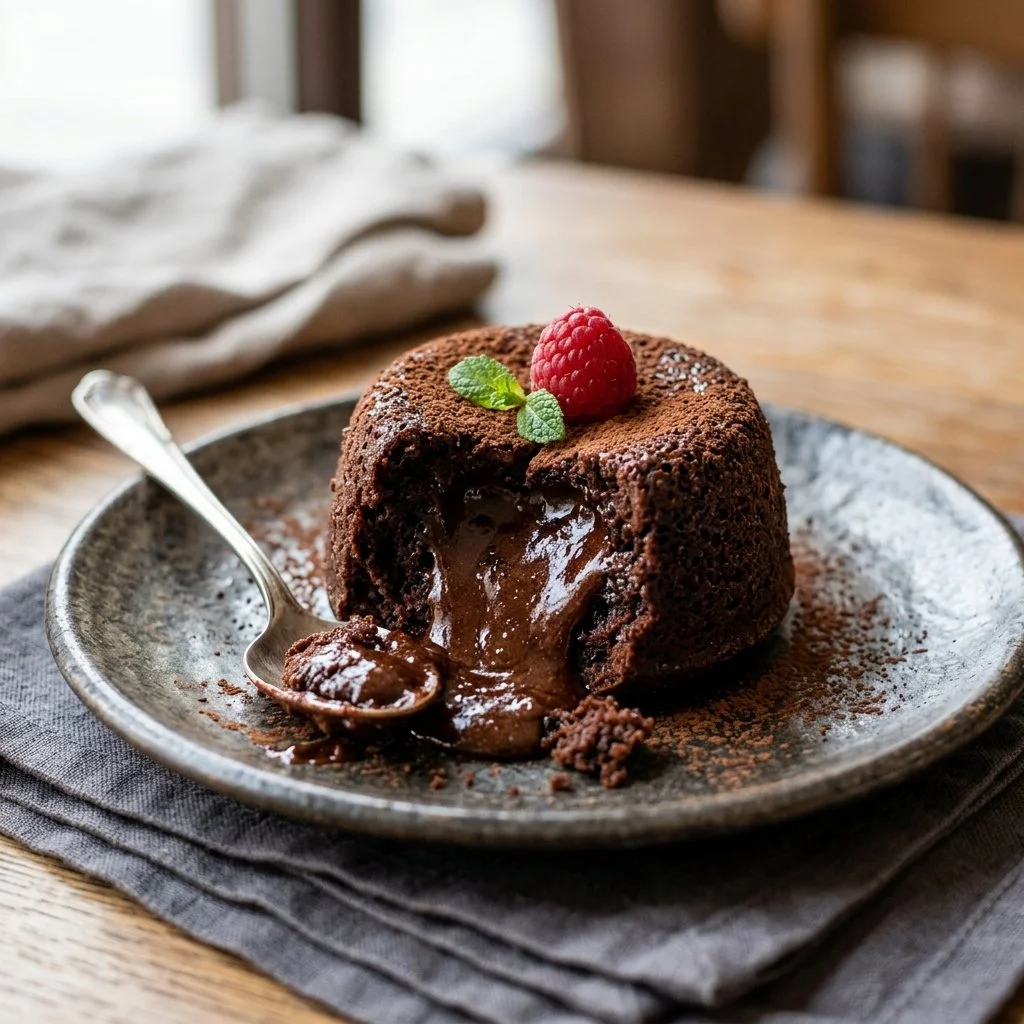
There are moments in life when something as simple as a dessert can evoke a flood of memories. For me, one of those moments occurred during a family gathering, where laughter and chatter filled the air. I distinctly remember walking into the kitchen and being greeted by the aroma of melted chocolate wafting through the room. My aunt was preparing her famous Chocolate Lava Cake, the centerpiece of our dessert table. Each time she made it, there was a delightful anticipation; we all knew that the real magic happened when we broke into the cake, revealing that luscious, gooey chocolate center that flowed out like a warm hug.
As we gathered around the table, spoons in hand, it felt like nothing short of an event. I realized that it wasn’t just about the cake itself; it was about connection, joy, and indulging in something exquisite together. Today, I want to share a version of that cherished recipe—one that brings the same warmth and magic to your home. So let’s dive into creating your very own Chocolate Lava Cake!
Recipe Timing
- Prep Duration: 15 minutes
- Active Cooking: 15 minutes
- Total Duration: 30 minutes
- Portion Size: Serves 4
- Complexity: Simple
Nutritional Recipe
- Calories per portion: Approximately 320
- Protein: 5g
- Carbs: 30g
- Fats: 19g
- Fiber: 1g
- Sugars: 17g
- Sodium: 90mg
Why You’ll Love This Chocolate Lava Cake
This Chocolate Lava Cake is more than just a dessert; it’s a symphony of textures and flavors that will make your taste buds sing. Picture this: a soft, tender cake with a rich, molten center. Each bite offers a deliciously decadent mix of sweetness and depth, which is easily enhanced by the option to serve it warm with a scoop of vanilla ice cream or a handful of fresh berries. It’s elegant enough for special occasions yet simple enough for a cozy night in. It’s the ultimate crowd-pleaser!
The Complete Cooking Journey
Leaping into this recipe is straightforward and rewarding. You’ll be mesmerized by how just a few ingredients can come together to create a show-stopping dessert. The soundtrack of chocolate melting, the sight of fluffy eggs transforming, and the aroma of freshly baked goodness will fill your kitchen and lift your spirits!
Ingredients:
- 1/2 cup unsalted butter
- 1 cup semisweet chocolate chips
- 2 large eggs
- 2 large egg yolks
- 1/4 cup granulated sugar
- 2 tablespoons all-purpose flour
- 1 teaspoon vanilla extract
- Pinch of salt
Method:
Step 1: Preheat the Oven
Preheat your oven to 425°F (220°C). Grease and flour four ramekins to ensure that your Cakes slip out effortlessly once baked.
Step 2: Melt the Butter and Chocolate
In a microwave-safe bowl or double boiler, combine the butter and chocolate chips. Heat until melted and smooth, stirring frequently to avoid burning. The delightful aroma will soon tempt your senses!
Step 3: Whisk the Eggs and Sugar
In a separate bowl, whisk together the eggs, egg yolks, and granulated sugar until the mixture becomes light and frothy. You want to incorporate air to create a lovely texture in the finished cake!
Step 4: Combine Chocolate Mixture
Pour the melted chocolate mixture into the egg mixture, stirring gently to combine everything. This is where the magic begins as the rich chocolate flavor meets the frothy eggs.
Step 5: Fold in the Dry Ingredients
Gently fold in the flour, vanilla extract, and a pinch of salt until just combined. Be careful not to overmix; we want to keep that wonderful airiness!
Step 6: Fill Ramekins
Evenly divide the luscious batter among the prepared ramekins. Each has a delicious destiny awaiting within!
Step 7: Bake to Perfection
Bake for 12-14 minutes or until the edges are firm yet the center remains soft. This ensures that glorious lava effect for each bite.
Step 8: Serve Warm
After baking, let the cakes cool for a minute before inverting them onto plates. Serve immediately, optionally with a scoop of ice cream or a handful of fresh berries to elevate your dessert experience.
Serving Suggestions & Pairings
Pair your Chocolate Lava Cake with a scoop of vanilla bean ice cream or freshly whipped cream for an indulgence that’s downright heavenly. Consider serving alongside a refreshing berry compote or a sprinkle of powdered sugar for a touch of elegance. A cup of espresso or a glass of dessert wine can add the perfect finishing touch to your dining experience.
Storage & Leftovers Guide
If you find yourself with leftovers (though I doubt it!), store the cooled cakes in an airtight container in the fridge for up to 2 days. To reheat, simply pop them in the microwave for a few seconds, and you’ll have a quick dessert ready to delight again.
Kitchen Wisdom & Success Tips
- Ensure your ramekins are well-greased and floured to prevent sticking.
- Baking time is crucial; keep an eye on them to ensure they don’t overbake.
- Experiment with different chocolate types for varying levels of sweetness.
- For a fun twist, add a spoonful of Nutella or caramel at the center before baking!
Flavor Variations & Adaptations
Feeling adventurous? Try incorporating a tablespoon of espresso powder for a mocha vibe or adding orange zest for a burst of citrus. You could also swap semisweet chocolate for dark chocolate for a deeper flavor. The delightful possibilities are endless!
Reader Questions & Solutions
-
Can I use mini ramekins?
Yes! Just reduce the baking time slightly and keep a close watch on them. -
What if I don’t have ramekins?
You can use a muffin tin; simply grease and flour them as you would the ramekins. -
Can I freeze these cakes?
Yes! Before baking, you can freeze the filled ramekins. Just add a few extra minutes to the baking time if baking from frozen. -
Is it essential to use unsalted butter?
Unsalted butter gives you the ability to control the salt in the recipe. However, if you only have salted butter, it can work fine—just reduce the added salt. -
Why did my cake turn out dry?
This could be due to overbaking. Make sure to bake just until the edges are firm while keeping the center soft.
Wrapping Up
Chocolate Lava Cake is the dessert that hits all the right notes—rich, indulgent, and simply heartwarming. Whether it’s a special occasion or a simple weekday treat, this dessert is sure to impress. So roll up your sleeves, gather your ingredients, and bring the enchanting experience of flowing chocolate to your kitchen today. Enjoy every bite of this enchanting creation, and remember, cooking is all about the joy we create around the table! Happy baking!


