Some mornings just need a win. The kind where your alarm goes off, you hit snooze one too many times, and the idea of standing at the stove stirring a pot of porridge feels like a full-blown life decision. That’s exactly where overnight oats saved me. I first discovered them during a chaotic back-to-work season when I desperately needed breakfast to stop being a battle. One evening, armed with a mason jar and a whisper of hope, I threw in some oats, milk, and chia seeds, gave it all a quick shake, and tucked it into the fridge. The next morning, I pulled out something that looked like a creamy, dreamy parfait — no cooking, no fuss, and honestly, it tasted better than any hot oatmeal I’d ever made. Since then, this little jar of magic has become my morning ritual, my travel comfort food, and the answer to every rushed weekday meal.
That’s the true beauty of overnight oats: they’re not a recipe so much as a gift you give your future self. You mix, you rest, you wake up to a breakfast that’s ready and waiting. So grab your favorite jar, raid your pantry, and let me walk you through everything you need to know about making the perfect bowl (or jar) of overnight oats.
Recipe Timing
- Prep Duration: 10 minutes
- Active Cooking: 0 minutes (no heat required!)
- Total Duration: 4 to 12 hours (including chill time)
- Portion Size: 1 serving
- Complexity: Simple
Nutritional Recipe
Based on a classic base of rolled oats, whole milk, chia seeds, a little maple syrup, and a fruit-and-nut topping, each serving comes out to roughly:
- Calories per portion: 380 kcal
- Protein: 14 g
- Carbs: 54 g
- Fats: 13 g
- Fiber: 9 g
- Sugars: 22 g
- Sodium: 180 mg
(Note: these numbers shift a little depending on your milk choice and toppings, but they’re a solid guide for your meal planning.)
Why You’ll Love This Overnight Oats
Let me count the ways. First, this is the ultimate no-cook recipe — literally zero heat, zero stirring over a stove, zero watching the pot boil over. It’s also wildly forgiving; you don’t need precise measurements or fancy equipment, just a jar, a spoon, and a fridge. If you’re someone who likes to meal prep, this is your new best friend because you can make several jars at once for the whole week.
I also love how endlessly customizable it is. The same creamy oat base can go tropical with pineapple and coconut, cozy with apples and cinnamon, or decadent with chocolate and peanut butter. Plus, it’s genuinely good for you — packed with fiber from the oats and chia, protein from the milk and yogurt, and natural sweetness from fruit. And the texture? Pure magic. The oats soak up the liquid overnight, turning into something that’s soft yet slightly chewy, thick yet spoonable, with a lovely pudding-like creaminess that feels indulgent without being heavy.
The Complete Cooking Journey
Making overnight oats is less about cooking and more about assembling a little creation ritual. In about ten minutes, you’ll combine your dry ingredients, whisk in your wet ingredients, and pour everything into a jar or bowl. From there, the fridge does all the work. The oats soften, the chia seeds swell into tiny tapioca-like pearls, and the flavors mingle and deepen. When you open that jar the next morning, you’ll find a thick, creamy breakfast that’s ready straight from the cold — or you can let it sit on the counter for a few minutes to take off the chill.
The journey is simple but satisfying: pick your jar, layer your ingredients, stir, seal, and sleep. The hardest part is waiting those overnight hours, but I promise — the anticipation builds the flavor story, and every spoonful hits that perfect balance of creamy, sweet, and nourishing.
Ingredients:
This is the classic, foolproof base that I return to again and again. You’ll notice the proportions are easy to remember: roughly a 1:1 or 1:1.5 ratio of oats to liquid, plus a little something to thicken and a little something to sweeten.
- ½ cup rolled oats (also called old-fashioned oats — avoid instant or steel-cut for this method)
- ½ cup milk of your choice (dairy, oat, almond, coconut, or soy all work beautifully)
- ¼ cup plain Greek yogurt or plant-based yogurt (for extra creaminess, optional but recommended)
- 1 tablespoon chia seeds
- 1 tablespoon maple syrup or honey
- ½ teaspoon vanilla extract
- ⅛ teaspoon salt
- Optional add-ins: fresh berries sliced banana, chopped nuts, nut butter, cinnamon, or shredded coconut
Method:
Step 1: Gather Your Jar and Tools
Choose a jar or container with a tight-fitting lid — a 16-ounce mason jar is perfect. You’ll also want a small measuring cup, measuring spoons, and a spoon for stirring. Clear jars are delightful because you can see the beautiful layers you’re creating.
Step 2: Combine the Dry Ingredients
In your jar, add the rolled oats, chia seeds, and salt. Give these a quick stir with a spoon so everything is evenly distributed. This step ensures the chia seeds won’t clump together when you add the liquid — that’s the secret to an evenly thick, pudding-like texture.
Step 3: Pour in the Wet Ingredients
Add the milk, Greek yogurt (if using), maple syrup, and vanilla extract. Make sure you’re using enough liquid; the oats and chia need it to soften and expand overnight. If your milk isn’t cold from the fridge, that’s fine — just remember everything will be chilled during the soaking time.
Step 4: Stir or Shake Thoroughly
This is the most important step! Stir everything together with your spoon, making sure to scrape the bottom and corners of the jar so no dry oats remain. Alternatively, you can screw on the lid and give the jar a vigorous shake for about 30 seconds. You’re looking for a uniform, slightly runny mixture at this stage — it will thicken a lot overnight.
Step 5: Seal and Refrigerate for the Soak
Pop the lid on your jar and place it in the refrigerator. Let it rest for at least 4 hours, but ideally overnight (8 to 12 hours). During this time, the oats absorb the liquid, the chia seeds swell, and everything becomes thick and cohesive. You can even make several jars at once for the week ahead.
Step 6: Check the Consistency and Adjust
In the morning, open the jar and give the oats a good stir. If they seem too thick for your liking, add a splash of milk and stir again. If they’re a bit too loose, stir in an extra tablespoon of chia seeds and let them sit for another 30 minutes.
Step 7: Add Toppings Before Serving
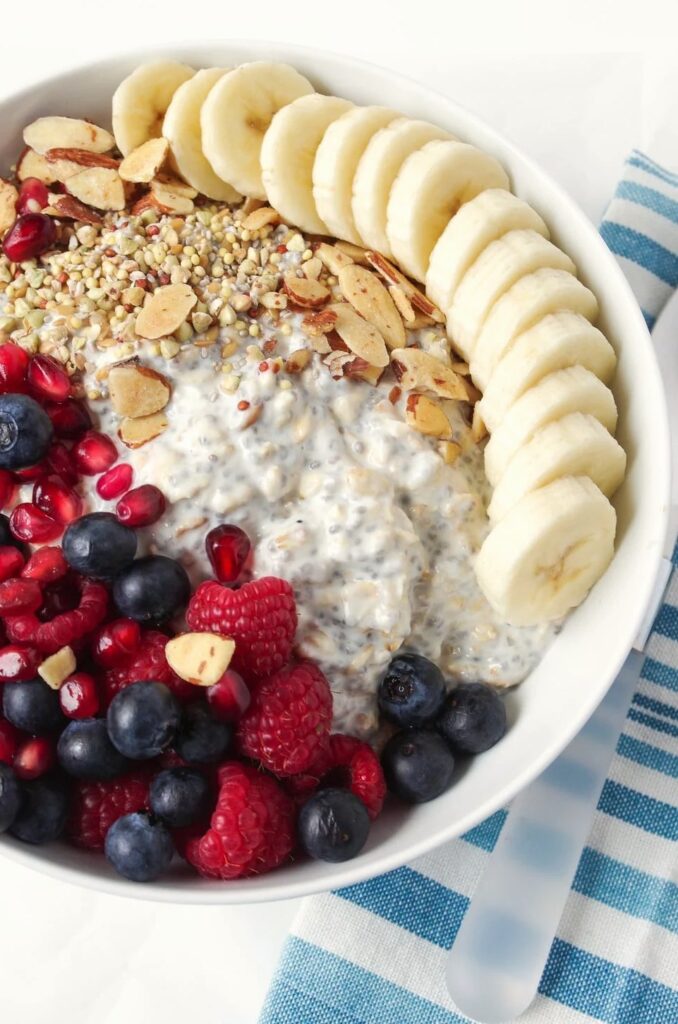
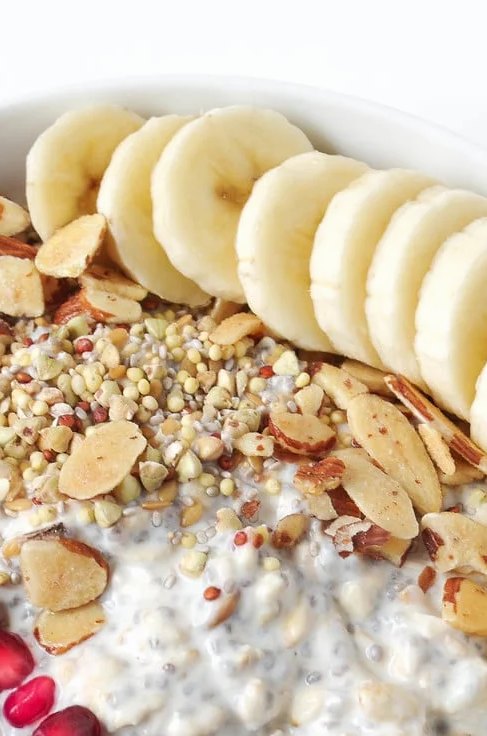
This is where the artistry comes in! Add your favorite toppings — fresh berries, banana slices, a drizzle of nut butter, a sprinkle of granola, or a dusting of cinnamon. The toppings add texture, color, and a pop of freshness that makes each jar unique.
Step 8: Serve Straight from the Jar or Plate It Up
Enjoy your overnight oats straight from the jar for a grab-and-go morning, or spoon them into a bowl and smooth the top for a more polished presentation. Tip them onto a plate for a pretty café-style look. This recipe serves one hungry person, but you can easily double or triple it for the whole family.
Serving Suggestions & Pairings
Overnight oats are wonderfully versatile when it comes to serving. On rushed mornings, I simply grab a jar, tuck a spoon into my bag, and enjoy them at my desk. On slower weekends, though, I like to treat them more like a proper brunch dish — spooned into a wide bowl, topped with a generous swirl of almond butter, a scattering of banana coins, and a crunchy sprinkle of toasted granola.
They pair beautifully with a hot cup of coffee or a green tea latte on the side. If you’re serving breakfast to guests, set up a “topping bar” with bowls of fresh fruit, nuts, seeds, shredded coconut, cacao nibs, and different nut butters, and let everyone customize their own jar. It’s an interactive, no-cook breakfast spread that feels both special and effortless.
Storage & Leftovers Guide
One of the best things about this recipe is how well it keeps. Store your overnight oats in an airtight jar in the refrigerator for up to 4 days. I like to meal prep two or three jars on Sunday evening so I have breakfast ready for the busiest mornings of the week.
Here’s the thing to keep in mind: oats continue to absorb liquid as they sit, so they’ll get thicker each day. When you take a jar out on day three or four, just stir in a splash of milk to loosen it back up to a creamy consistency. If you’ve already added fresh fruit toppings, try to add them the morning you eat rather than when you first make the jar — this keeps them from turning mushy and keeps everything tasting fresh. Avoid freezing overnight oats; the texture of the dairy and chia can become watery and grainy once thawed, and since they keep so well in the fridge, there’s no real need.
Kitchen Wisdom & Success Tips
The first and most important secret: always use rolled oats, not steel-cut or instant. Steel-cut oats won’t soften properly without cooking and will remain hard and crunchy, while instant oats turn into a sloppy mush. Rolled oats hit that perfect sweet spot — creamy but with a satisfying tenderness.
Second, the ratio matters more than precision. Stick to about 1 part oats to 1 to 1.5 parts liquid. If you like a thicker, spoon-standing-up texture, use equal parts oats and milk. If you prefer a slightly thinner, drinkable consistency, bump up the milk.
Third, don’t skip the chia seeds! They’re not just for nutrition; they’re the magic ingredient that gives overnight oats their signature pudding-like body. And if you’re out of chia, you can swap in ground flaxseeds, although the texture will be a touch less gelatinous.
Finally, trust your taste buds. Some people find maple syrup necessary; others love a more savory twist with a pinch of cinnamon and a dollop of peanut butter. Start with the classic recipe, then tweak to your heart’s content. And remember, a tiny pinch of salt elevates everything — it balances sweetness and makes all the flavors shine.
Flavor Variations & Adaptations
Once you’ve mastered the classic base, the flavor world is your oyster. Here are a few of my favorite combinations:
- Peanut Butter Banana: Mash half a ripe banana into the base, add 1 tablespoon of peanut butter, and top with extra banana slices and a sprinkle of crushed peanuts.
- Berry Bliss: Fold fresh or frozen mixed berries (blueberries, strawberries, raspberries) into the jar before chilling. The berries release their juices and tint the oats a lovely pink-purple.
- Apple Pie: Add ½ teaspoon of cinnamon and a pinch of nutmeg to the dry ingredients, then top with stewed or finely diced fresh apple and a drizzle of caramel or maple syrup.
- Chocolate Cherry: Stir in 1 tablespoon of cocoa powder and top with dark chocolate shavings and cherries. It tastes like dessert for breakfast.
- Tropical Getaway: Swap the milk for coconut milk, use chopped pineapple and mango, and sprinkle shredded coconut on top for instant island vibes.
- Savory Oats: Not in a sweet mood? Reduce the sweetener, skip the fruit, and top with a soft-boiled egg, a sprinkle of everything bagel seasoning, and some scallions for an unexpected savory twist.
Dairy-free and vegan adaptations are incredibly easy too — just use your favorite plant milk and a dairy-free yogurt, and swap honey for maple syrup. You won’t sacrifice any of the creaminess.
Reader Questions & Solutions
Q: Why are my overnight oats still crunchy and dry in the morning?
A: That usually means you didn’t use enough liquid, or you accidentally used steel-cut oats instead of rolled oats. Check your ratio — at least equal parts liquid to oats is a must — and give that jar a really good stir so every oat gets coated. It’s also helpful to let the jar sit for the full 8 hours; 4 hours is a minimum, not a guarantee.
Q: Can I eat overnight oats warm instead of cold?
A: Absolutely. If you prefer a warm breakfast, just pop the jar in the microwave for 60 to 90 seconds the next morning. Give it a stir, add a splash of milk if it looks dry, and you’ll get all that creamy comfort without standing at the stove.
Q: Are overnight oats safe to eat every day?
A: Yes, and many people do! They’re packed with fiber, protein, and healthy fats. Because they’re so balanced, they keep you full and satisfied. Just vary your toppings and nut butters to rotate your nutrients and keep things exciting.
Q: My oats turned out too thick — is there a way to save them?
A: Definitely. Stir in a few tablespoons of milk, yogurt, or even a spoonful of apple juice or orange juice to loosen the mixture back up. Add a little at a time until you hit your desired consistency.
Q: Can I use quick oats or gluten-free oats?
A: Quick oats are okay in a pinch; they’ll be softer and slightly mushier but still tasty. If you’re gluten-intolerant, look for certified gluten-free rolled oats, which are widely available and work exactly the same in this recipe.
Q: How long can I keep overnight oats in the refrigerator before they spoil?
A: They’ll stay fresh for up to 4 days when stored in an airtight container. After that, the texture degrades noticeably, and you risk food safety issues, especially if you’ve used dairy milk. If you’re making a big batch, mark the jars with the date so you know which to eat first.
Wrapping Up
I genuinely believe overnight oats are one of the simplest ways to make your mornings a little kinder. They ask so little of you — just a few minutes of measuring and stirring before bed — and give back so much: a nourishing, vibrant breakfast that feels like a little celebration waiting in the fridge. Whether you’re a busy parent, a student with early classes, or someone who just wants a little more peace at the breakfast table, these creamy jars are here for you.
I hope you’ll try this recipe, make it your own, and find your favorite flavor combination. Start with the classic base, play with the toppings, and before you know it, you’ll have a jar in the fridge every single night. Happy overnight oat-making, friend — your future self is already thanking you.
{ “@context”: “https://schema.org”, “@type”: “Recipe”, “name”: “Overnight Oats”, “headline”: “Overnight Oats”, “description”: “Some mornings just need a win. The kind where your alarm goes off, you hit snooze one too many times, and the idea of standing at the stove stirring a pot of…”, “datePublished”: “2026-01-15T00:00:00+00:00”, “dateModified”: “2026-10-09T09:30:59.797Z”, “author”: { “@type”: “Person”, “name”: “COOKING WITH MAYAA” }, “url”: “https://cookingwithmayaa.com/overnight-oats-3/”, “image”: [ “https://cookingwithmayaa.com/wp-content/uploads/2026/10/overnight-oat.jpg” ], “prepTime”: “PT10M”, “cookTime”: “PT0M”, “totalTime”: “PT12H”, “recipeYield”: “1 serving”, “recipeIngredient”: [ “This is the classic, foolproof base that I return to again and again. You’ll notice the proportions are easy to remember: roughly a 1:1 or 1:1.5 ratio of oats to liquid, plus a little something to thicken and a little something to sweeten.”, “½ cup rolled oats (also called old-fashioned oats — avoid instant or steel-cut for this method)”, “½ cup milk of your choice (dairy, oat, almond, coconut, or soy all work beautifully)”, “¼ cup plain Greek yogurt or plant-based yogurt (for extra creaminess, optional but recommended)”, “1 tablespoon chia seeds”, “1 tablespoon maple syrup or honey”, “½ teaspoon vanilla extract”, “⅛ teaspoon salt”, “Optional add-ins: fresh berries sliced banana, chopped nuts, nut butter, cinnamon, or shredded coconut” ], “nutrition”: { “@type”: “NutritionInformation”, “calories”: “380 kcal calories”, “proteinContent”: “14 g g”, “carbohydrateContent”: “54 g g”, “fatContent”: “13 g g” } }