
There’s something magical about the first bite of a crunchy, tangy pickled vegetable. I still remember the summer BBQs at my grandma’s house, where the sun seemed to shine a little brighter and laughter echoed throughout the backyard. Amidst the grilled meats and fresh corn, there was always a bowl of her famous pickled veggies, glistening like jewels against the picnic table. The cool crunch of carrots, the bright snap of cucumbers, and the zing of chef-grade vinegar was my favorite accompaniment to almost any dish. Those simple, vibrant flavors have stayed with me through the years, inspiring me to create my own version that captures the joy of those precious moments.
So, if you’re looking to evoke that nostalgic feeling or simply want to elevate your meals with a tangy, flavorful twist, you’re in for a treat! This recipe for Crunchy Tangy Refrigerator Pickled Vegetables is straightforward, customizable, and perfect for anyone—from beginners to seasoned cooks. Let’s dive into this vibrant culinary adventure!
Recipe Timing
- Prep Duration: 15 minutes
- Active Cooking: 10 minutes
- Total Duration: 1 hour (plus refrigeration time)
- Portion Size: About 4 servings
- Complexity: Simple
Nutritional Recipe
- Calories per portion: 60
- Protein: 1g
- Carbs: 12g
- Fats: 0g
- Fiber: 2g
- Sugars: 5g
- Sodium: 800mg
Why You’ll Love This Crunchy Tangy Refrigerator Pickled Vegetables
The beauty of refrigerator pickles lies in their incredible versatility. These Crunchy Tangy Refrigerator Pickled Vegetables can brighten up a simple sandwich, become a zesty addition to a salad, or serve as a refreshing snack right from the jar. Plus, you can mix and match your favorite veggies, allowing you to create a unique flavor profile with every batch. Unlike traditional canning, the refrigerator method is much easier, giving you a fresh burst of flavors in just a day or two!
The Complete Cooking Journey
You may be wondering how to get started. Don’t worry; I’ve got you covered! This recipe involves just a handful of simple steps—from slicing your favorite veggies to creating a sweet and tangy brine. With just about half an hour of hands-on time, you’ll have crunchy delights ready to chill in your fridge.
Ingredients:
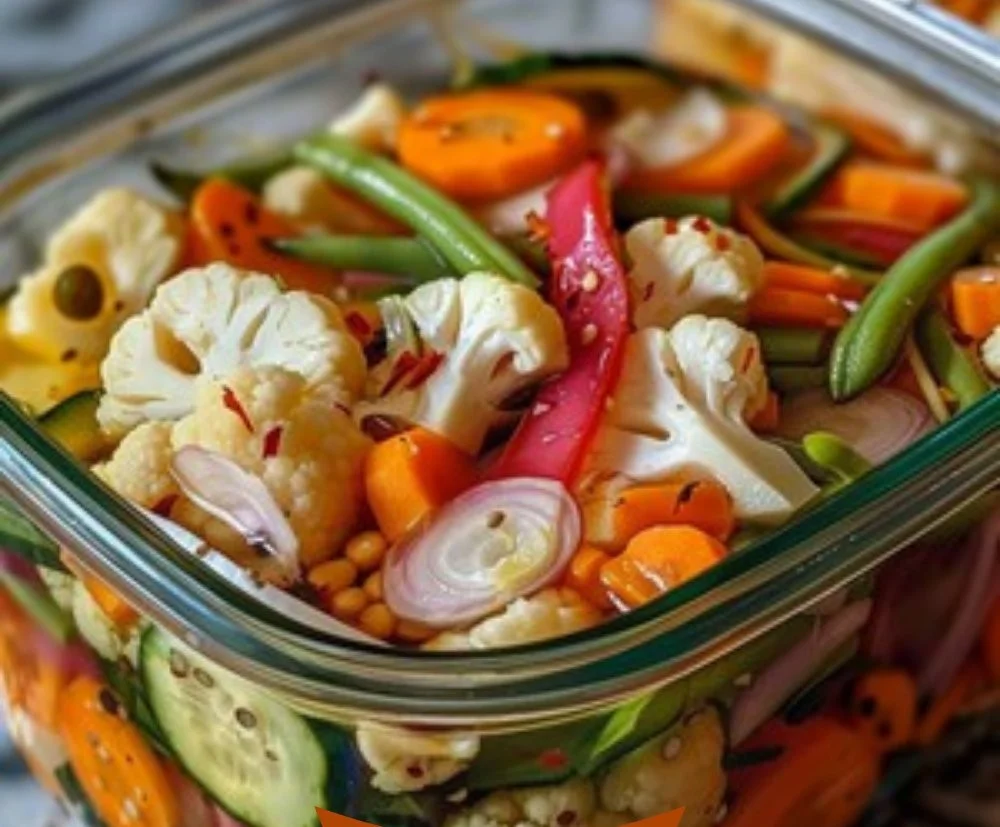
- 1 cup assorted vegetables (carrots, cucumbers, bell peppers, etc.)
- 1 cup vinegar (white or apple cider)
- 1 cup water
- 2 tablespoons sugar
- 2 tablespoons salt
- 1 teaspoon mustard seeds
- 1 teaspoon black peppercorns
- 2 cloves garlic, minced
- 1 teaspoon red pepper flakes (optional)
Method:
Step 1: Wash and Slice the Vegetables
Start by giving your assorted veggies a good rinse under cool water. This step is key to ensuring your pickles remain crisp and tasty. After washing, slice the vegetables into bite-sized pieces. You can go for matchsticks, rounds, or any preferred shape—whatever makes your heart happy!
Step 2: Combine Ingredients for the Brine
In a medium saucepan, combine the vinegar, water, sugar, and salt. Turn the heat to medium and stir until the sugar and salt dissolve completely. This brine is what infuses the vegetables with all that delicious flavor!
Step 3: Add Spices for Flavor
Once the sugar and salt have dissolved, it’s time to add the mustard seeds, black peppercorns, minced garlic, and if you’d like a little kick, the red pepper flakes. Stir the mixture and let the spices mingle with the brine for an added depth of flavor that will have your taste buds singing.
Step 4: Cooling the Brine
Remove the saucepan from the heat and allow the brine to cool to room temperature. This crucial step prevents the veggies from wilting when you pour the hot liquid over them.
Step 5: Pack the Vegetables into the Jar
In a clean, sterilized jar, tightly pack your sliced vegetables. The idea is to keep them as snug as a bug in a rug. Then, pour the cooled brine over the vegetables until they are fully submerged.
Step 6: Seal and Refrigerate
Seal the jar tightly with a lid and pop it in the refrigerator. For the best flavor, let it rest for at least 24 hours. You can enjoy these pickled veggies for several weeks—if they last that long!
Serving Suggestions & Pairings
These crunchy pickled vegetables are incredibly versatile! Serve them alongside grilled meats, as a topping for tacos, or toss them into a colorful salad for a pop of flavor. Pair them with creamy dips or cheese boards, or enjoy them as a refreshing snack right from the jar. The possibilities are endless!
Storage & Leftovers Guide
Store your refrigerator pickles in the fridge, where they will keep well for up to two weeks. Make sure the vegetables remain submerged in the brine to help retain their crunchiness and flavor. Always use clean utensils to reach into the jar to maintain freshness.
Kitchen Wisdom & Success Tips
- Use a mix of your favorite vegetables—don’t limit yourself! Think radishes, asparagus, or even green beans for a unique crunch.
- For those who like things on the sweeter side, add a little more sugar to the brine.
- If you want added depth, try adding a few sprigs of dill, bay leaves, or fresh ginger into the jar before pouring the brine over.
Flavor Variations & Adaptations
Feeling adventurous? Experiment with different spices! Add coriander seeds for a citrusy punch or fresh herbs like thyme or dill for an exciting twist. You can even swap traditional vinegar with flavored varieties such as rice vinegar or red wine vinegar to create unique taste profiles that spark joy.
Reader Questions & Solutions
Q: Can I use frozen vegetables for this recipe?
A: It’s best to use fresh vegetables, as frozen veggies may not retain their crunch after pickling.
Q: What if I don’t have mustard seeds?
A: You can leave them out or substitute with cumin seeds for a different flavor.
Q: How can I make these pickles spicier?
A: Simply increase the amount of red pepper flakes or add some sliced jalapeño to the jar!
Q: Can I use this brine for other vegetables?
A: Absolutely! The brine is versatile; try it with cauliflower, green beans, or even fruits like peaches for a sweet treat!
Q: What’s the best way to clean my jars?
A: Wash them in hot soapy water, then sterilize them by boiling them in water for 10 minutes or running them through the dishwasher.
Wrapping Up
Creating these Crunchy Tangy Refrigerator Pickled Vegetables is a delightful experience filled with nostalgia and flavor. They bring color, crunch, and zing to your meals, making them a must-have in any kitchen. I hope you enjoy making this recipe as much as I do! So, gather your veggies, slice them up, and let’s get pickling. Bon appétit!
PrintCrunchy Tangy Refrigerator Pickled Vegetables

A vibrant recipe for crunchy, tangy refrigerator pickled vegetables, perfect as a side dish or snack.
- Prep Time: 15 minutes
- Cook Time: 10 minutes
- Total Time: 60 minutes (plus refrigeration time)
- Yield: 4 servings 1x
- Category: Side Dish
- Method: Refrigerating
- Cuisine: International
- Diet: Vegetarian
Ingredients
- 1 cup assorted vegetables (carrots, cucumbers, bell peppers, etc.)
- 1 cup vinegar (white or apple cider)
- 1 cup water
- 2 tablespoons sugar
- 2 tablespoons salt
- 1 teaspoon mustard seeds
- 1 teaspoon black peppercorns
- 2 cloves garlic, minced
- 1 teaspoon red pepper flakes (optional)
Instructions
- Wash and slice the vegetables into bite-sized pieces.
- Combine the vinegar, water, sugar, and salt in a medium saucepan and heat until dissolved.
- Add mustard seeds, black peppercorns, minced garlic, and red pepper flakes to the brine.
- Remove from heat and let the brine cool to room temperature.
- Pack the sliced vegetables into a clean, sterilized jar.
- Pour the cooled brine over the vegetables until fully submerged.
- Seal the jar tightly and refrigerate for at least 24 hours before enjoying.
Notes
These pickled vegetables are best enjoyed after resting in the fridge for at least 24 hours.
Nutrition
- Serving Size: 1 serving
- Calories: 60
- Sugar: 5g
- Sodium: 800mg
- Fat: 0g
- Saturated Fat: 0g
- Unsaturated Fat: 0g
- Trans Fat: 0g
- Carbohydrates: 12g
- Fiber: 2g
- Protein: 1g
- Cholesterol: 0mg


