
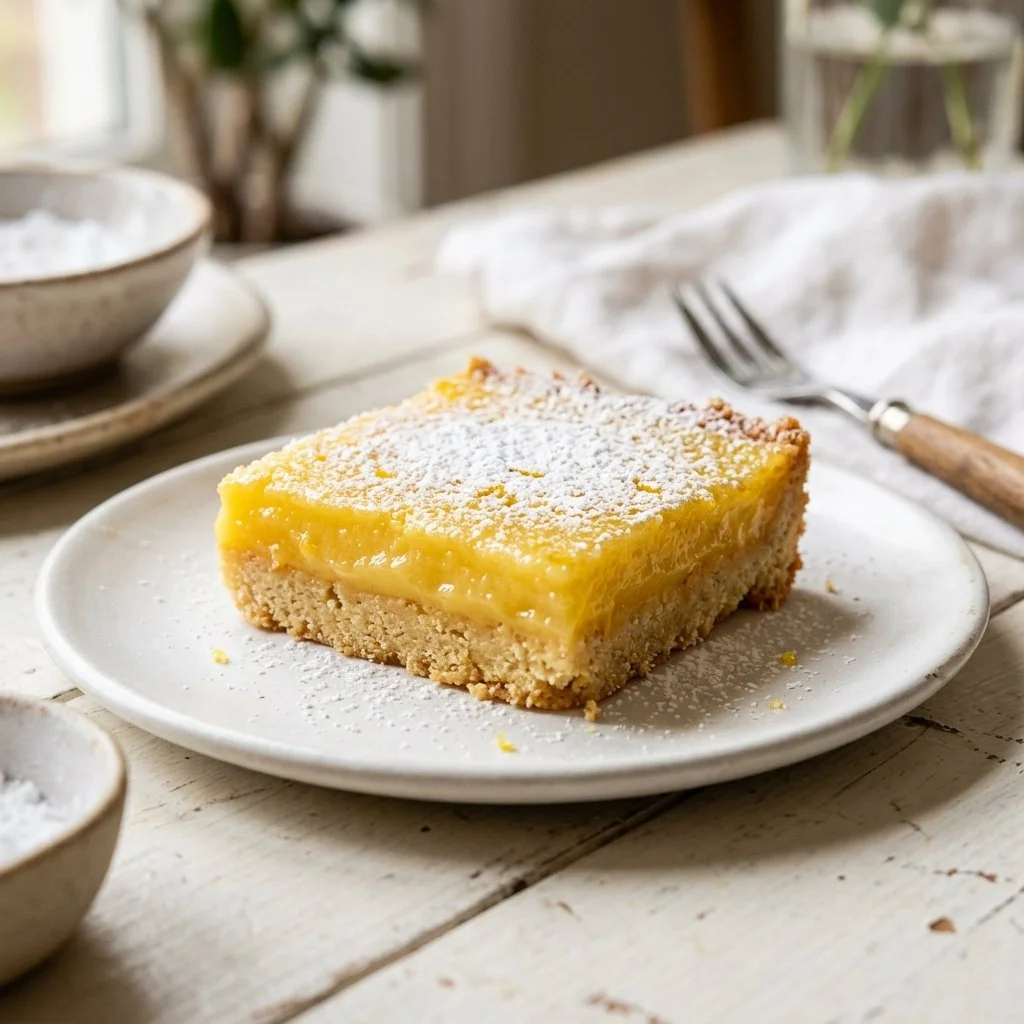
There’s something undeniably refreshing about a sunny afternoon spent in the kitchen, the promise of sweet and tart lemon bars filling the air. I remember the first time I tasted homemade lemon bars—my mom had made a batch for a summer picnic, and the moment I took a bite, I was enchanted by the way the zesty lemon flavor danced on my tongue, perfectly balanced with a buttery crust. It was like sunshine in a dessert, every square bursting with vibrant flavor! Since then, these delightful bars have become a staple in my home, a go-to treat that brings comfort and a sense of nostalgia. Today, I’m thrilled to share my recipe for these cherished lemon bars, perfect for spring gatherings or simply to brighten your day.
Recipe Timing
- Prep Duration: 10 minutes
- Active Cooking: 35 minutes
- Total Duration: 45 minutes
- Portion Size: 16 squares
- Complexity: Simple
Nutritional Recipe
- Calories per portion: Approximately 135
- Protein: 1g per serving
- Carbs: 20g per serving
- Fats: 6g per serving
- Fiber: 0g per serving
- Sugars: 11g per serving
- Sodium: 35mg per serving
Why You’ll Love This Lemon Bars Recipe
These lemon bars are like a breath of fresh air! They are simple to make yet sophisticated enough to impress your friends. The buttery crust provides the ideal foundation for the smooth, tangy filling, making each bite a delight. Plus, they’re incredibly versatile—perfect for any occasion, from casual snacks to elegant parties. Each square can be a little piece of joy, and they’re so easy to whip up that you’ll find yourself making them again and again.
The Complete Cooking Journey
Making lemon bars is a delightful experience from start to finish. First, we blend together the simple ingredients for the crust, pressing it firmly into the baking pan—this is the base that will cradle the creamy lemon filling. Once baked, we whisk together the zesty filling that transforms the whole setup into something magical. As the bars bake to perfection, your kitchen will fill with the tantalizing aroma of lemon and sugar, and by the time they cool, you’ll be counting down the moments until you take that first delicious bite!
Ingredients:
- 1 cup all-purpose flour
- 1/2 cup powdered sugar
- 1/2 cup unsalted butter, softened
- 1 cup granulated sugar
- 2 large eggs
- 1/2 cup fresh lemon juice
- 1 teaspoon lemon zest
- 1/2 teaspoon baking powder
- 1/4 teaspoon salt
Method:
Step 1: Preheat the Oven
Preheat oven to 350°F (175°C). Grease an 8×8 inch baking pan to ensure your lemon bars come out easily once they’re baked.
Step 2: Create the Crust
In a bowl, mix together the flour, powdered sugar, and softened butter until the mixture is crumbly. This buttery base is essential, so don’t rush this step! Press the crust mixture firmly into the bottom of the prepared pan. Bake for 15 minutes, just until it’s lightly golden.
Step 3: Whisk the Filling
In another bowl, whisk together the granulated sugar, eggs, fresh lemon juice, lemon zest, baking powder, and salt until well combined. This lemon filling will be the star of your bars—don’t skimp on the zest; it adds a wonderful depth!
Step 4: Combine and Bake
Once the crust has baked, pour the lemon filling over the baked crust. Put it back in the oven and bake for an additional 20-25 minutes, or until the filling is set but still slightly jiggly in the center.
Step 5: Cool and Dust
Allow the lemon bars to cool completely in the pan before cutting into squares. Dust with powdered sugar before serving for that perfect finishing touch.
Serving Suggestions & Pairings
These lemon bars are delightful on their own, but they can also be accompanied by a dollop of freshly whipped cream or a scoop of vanilla ice cream for an extra indulgent treat. Consider pairing them with iced tea or a light white wine for a refreshing afternoon snack.
Storage & Leftovers Guide
Store your lemon bars in an airtight container in the fridge for up to a week. If you want to keep them longer, you can freeze them for up to three months. Just be sure to wrap them tightly in plastic wrap or foil to prevent freezer burn.
Kitchen Wisdom & Success Tips
- Make sure your butter is softened, but not melted, for the best crust texture.
- Use fresh lemons for the best flavor—those little yellow gems pack a punch!
- If you like a stronger lemon flavor, feel free to add more zest; just remember, a little can go a long way.
- For a twist, try adding a little bit of lavender or fresh herbs like thyme to the filling for a unique twist.
Flavor Variations & Adaptations
For a lovely twist on this classic recipe, try integrating flavors like lavender or even a hint of ginger for some warmth. You can swap half of the granulated sugar with brown sugar for a rich, caramel-like backnote. If you want to lighten the recipe, substitute half of the butter with Greek yogurt for a healthier version.
Reader Questions & Solutions
-
Can I use bottled lemon juice instead of fresh?
While bottled juice is convenient, fresh lemon juice has a brighter flavor that really makes this dish shine. If possible, opt for fresh! -
How do I know when the bars are done?
The lemon filling should be set around the edges and slightly jiggly in the center. They will continue to firm up as they cool. -
What can I do if my crust is too crumbly?
If your crust mixture seems too crumbly to hold together, try adding a tablespoon of cold water or lemon juice to help bind it. -
Can I double the recipe?
Absolutely! Just use a larger baking dish, and be sure to adjust the baking time accordingly. -
How can I prevent the crust from getting soggy?
Pre-baking the crust until lightly golden helps create a barrier that keeps it from getting soggy.
Wrapping Up
There you have it—a simple yet irresistible recipe for homemade lemon bars that will have your friends and family begging for seconds! They encapsulate the joy of cooking with their bright flavor and delightful texture. So, whether it’s a sunny afternoon treat or a sweet addition to your next gathering, these lemon bars are sure to shine. Get ready to create sunshine in your kitchen and enjoy every zesty bite! Happy baking!
PrintHomemade Lemon Bars

Delightful homemade lemon bars with a buttery crust and zesty lemon filling, perfect for spring gatherings.
- Prep Time: 10 minutes
- Cook Time: 35 minutes
- Total Time: 45 minutes
- Yield: 16 squares 1x
- Category: Dessert
- Method: Baking
- Cuisine: American
- Diet: Vegetarian
Ingredients
- 1 cup all-purpose flour
- 1/2 cup powdered sugar
- 1/2 cup unsalted butter, softened
- 1 cup granulated sugar
- 2 large eggs
- 1/2 cup fresh lemon juice
- 1 teaspoon lemon zest
- 1/2 teaspoon baking powder
- 1/4 teaspoon salt
Instructions
- Preheat the oven to 350°F (175°C). Grease an 8×8 inch baking pan.
- Mix together the flour, powdered sugar, and softened butter until crumbly. Press into the bottom of the pan. Bake for 15 minutes.
- Whisk together the granulated sugar, eggs, fresh lemon juice, lemon zest, baking powder, and salt until combined.
- Pour the lemon filling over the baked crust. Bake for an additional 20-25 minutes, until set but jiggly in the center.
- Cool completely in the pan before cutting into squares. Dust with powdered sugar before serving.
Notes
For richer flavor, use fresh lemons and feel free to add more zest. These bars can be paired with whipped cream or ice cream for extra indulgence.
Nutrition
- Serving Size: 1 square
- Calories: 135
- Sugar: 11g
- Sodium: 35mg
- Fat: 6g
- Saturated Fat: 4g
- Unsaturated Fat: 2g
- Trans Fat: 0g
- Carbohydrates: 20g
- Fiber: 0g
- Protein: 1g
- Cholesterol: 30mg


