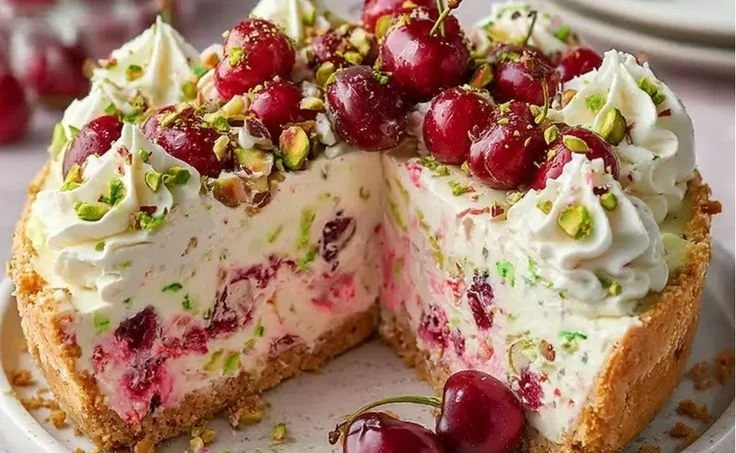
As I stood in my kitchen, the aroma of freshly crushed pistachios wafted through the air, and I couldn’t help but smile. Growing up, cheesecake was a celebratory dessert, a sweet conclusion to many family gatherings. And now, I was ready to put my spin on it. Today, I’m excited to share with you my latest creation: Luscious Lemon-Lime Cherry Pistachio Cheesecake. With its creamy texture, zesty notes, and a burst of cherry on top, this cheesecake will surely delight anyone who takes a bite. Let’s embark on this delicious journey together!
Recipe Timing
- Prep Duration: 20 minutes
- Active Cooking: 50 minutes
- Total Duration: 4 hours (plus chilling time)
- Portion Size: Serves 8
- Complexity: Moderate
Nutritional Recipe
- Calories per portion: 380
- Protein: 7g
- Carbs: 34g
- Fats: 25g
- Fiber: 1g
- Sugars: 19g
- Sodium: 300mg
Why You’ll Love This Luscious Lemon-Lime Cherry Pistachio Cheesecake
There’s something utterly enchanting about the combination of lemon and lime. Their bright, tart flavors are perfectly balanced by the creamy richness of cream cheese and the delightful crunch of a pistachio crust. Topped generously with sweet cherry pie filling, this cheesecake is not just a dessert; it’s an experience. Each bite invites you to bask in the warmth of sunny days and special moments shared with loved ones. Whether you bring it to a potluck, serve it at a dinner party, or enjoy it quietly at home, this cheesecake will leave a lasting impression.
The Complete Cooking Journey
Let’s gather our ingredients and bring this beautiful cheesecake to life! Knowing the steps is half the battle, so follow along as we bring together flavors and textures that harmonize gloriously. Trust me, the rewards at the end are more than worth it!
Ingredients:
- 1 1/2 cups crushed pistachios (for crust)
- 1/2 cup butter, melted (for crust)
- 2 tablespoons sugar (for crust)
- 2 cups cream cheese, softened
- 1 cup sugar
- 1 tablespoon lemon juice
- 1 tablespoon lime juice
- 1 teaspoon vanilla extract
- 3 large eggs
- 1 can cherry pie filling
- Zest of 1 lemon
- Zest of 1 lime
Method:
Step 1: Preheat the Oven and Prepare the Crust
Preheat the oven to 325°F (160°C). In a mixing bowl, combine the crushed pistachios, melted butter, and sugar. Press the mixture firmly into the bottom of a 9-inch springform pan to form the crust.
Step 2: Create the Cream Cheese Mixture
In a large bowl, beat together the cream cheese and sugar until smooth. Add the lemon juice, lime juice, vanilla extract, and zests, mixing until well combined.
Step 3: Incorporate the Eggs
Add the eggs one at a time, mixing thoroughly after each addition. This ensures your filling will be beautifully smooth and fluffy.
Step 4: Combine and Pour
Pour the cream cheese mixture over the crust in the springform pan, spreading it evenly with a spatula.
Step 5: Bake the Cheesecake
Bake for about 45-50 minutes, until the center is set but still slightly jiggly. Don’t worry if it jiggles a bit—it will firm up as it cools!
Step 6: Cool and Chill
Let the cheesecake cool at room temperature. Once cooled, refrigerate for at least 4 hours or overnight to help it set fully.
Step 7: Garnish with Cherry Pie Filling
Before serving, top your cheesecake with a generous helping of cherry pie filling. The vibrant red cherries sprinkle a bit of joy on your creation!
Serving Suggestions & Pairings
Serve this lovely cheesecake with a dollop of whipped cream or a sprinkle of fresh mint for an elegant touch. Paired with a hot cup of coffee or a refreshing iced tea, it makes for a perfect afternoon delight or a special dessert after dinner.
Storage & Leftovers Guide
If you have leftovers (which I hope you do!), this cheesecake can be stored in the refrigerator for up to five days. Just cover it with plastic wrap or place it in an airtight container to keep it fresh. Alternatively, you can freeze slices for up to three months—just thaw in the fridge overnight before serving again.
Kitchen Wisdom & Success Tips
- Ensure your cream cheese is at room temperature for easy mixing. Soften it in the microwave for about 15 seconds if you forget to take it out ahead of time!
- Keep an eye on the cheesecake while it bakes; every oven is different. You want a slight jiggle in the center when you remove it.
- If you don’t have pistachios, feel free to swap them out for graham cracker crumbs or almonds—both will work deliciously as a crust!
Flavor Variations & Adaptations
For a chocolate twist, consider adding a layer of chocolate ganache atop the cream cheese filling before garnishing with cherries. You can also experiment with adding different fruit toppings like fresh blueberries or strawberries to change things up!
Reader Questions & Solutions
-
Why did my cheesecake crack?
A crack can happen if the cheesecake bakes too quickly or if the oven temperature is too high. Make sure to bake low and slow! -
Can I use low-fat cream cheese?
Yes, you can use low-fat cream cheese, but the texture may vary slightly. For the best results, full-fat cream cheese will yield a creamier cheesecake. -
How do I know when my cheesecake is done?
The cheesecake will be done when it is set around the edges but still slightly jiggly in the center. -
Can I make this ahead of time?
Absolutely! This cheesecake is perfect for making ahead. Just remember to allow it to chill thoroughly in the fridge. -
What can I use instead of cherry pie filling?
You can substitute with fresh fruit, a berry compote, or even a drizzle of chocolate or caramel sauce if you want something sweeter.
Wrapping Up
So there you have it—my Luscious Lemon-Lime Cherry Pistachio Cheesecake! I hope it brings as much joy to your kitchen as it does to mine. Don’t shy away from trying new recipes; cooking is about discovery and sharing beautiful moments. Happy baking, and may your cheesecake always be luscious!
PrintLuscious Lemon-Lime Cherry Pistachio Cheesecake

A creamy cheesecake with a delightful pistachio crust, zesty lemon-lime flavor, and cherry pie filling on top.
- Prep Time: 20 minutes
- Cook Time: 50 minutes
- Total Time: 240 minutes
- Yield: 8 servings 1x
- Category: Dessert
- Method: Baking
- Cuisine: American
- Diet: Vegetarian
Ingredients
- 1 1/2 cups crushed pistachios (for crust)
- 1/2 cup butter, melted (for crust)
- 2 tablespoons sugar (for crust)
- 2 cups cream cheese, softened
- 1 cup sugar
- 1 tablespoon lemon juice
- 1 tablespoon lime juice
- 1 teaspoon vanilla extract
- 3 large eggs
- 1 can cherry pie filling
- Zest of 1 lemon
- Zest of 1 lime
Instructions
- Preheat the oven to 325°F (160°C). In a mixing bowl, combine the crushed pistachios, melted butter, and sugar. Press the mixture firmly into the bottom of a 9-inch springform pan to form the crust.
- Create the cream cheese mixture: In a large bowl, beat together the cream cheese and sugar until smooth. Add the lemon juice, lime juice, vanilla extract, and zests, mixing until well combined.
- Incorporate the eggs one at a time, mixing thoroughly after each addition.
- Pour the cream cheese mixture over the crust in the springform pan, spreading it evenly with a spatula.
- Bake for about 45-50 minutes, until the center is set but still slightly jiggly.
- Cool at room temperature. Once cooled, refrigerate for at least 4 hours or overnight to help it set fully.
- Top your cheesecake with a generous helping of cherry pie filling before serving.
Notes
Store leftovers in the refrigerator for up to five days or freeze slices for up to three months.
Nutrition
- Serving Size: 1 slice
- Calories: 380
- Sugar: 19g
- Sodium: 300mg
- Fat: 25g
- Saturated Fat: 10g
- Unsaturated Fat: 15g
- Trans Fat: 0g
- Carbohydrates: 34g
- Fiber: 1g
- Protein: 7g
- Cholesterol: 150mg