It was rainy and gray the afternoon I decided to dig deep into my recipe box, searching for something comforting and nostalgic. I stumbled across my grandmother’s Old-Fashioned Tuna Casserole recipe, a dish that paved the way for countless family dinners and chilly nights. The aroma of that creamy goodness wafted through her cozy kitchen, effortlessly inviting everyone to gather ’round. It wasn’t just a meal; it was a hug in a dish, bridging generations and filling bellies with warmth. I knew right then that it was time to whip up this classic recipe, reminiscent of simpler times and childhood comforts.
Recipe Timing
- Prep Duration: 15 minutes
- Active Cooking: 15 minutes
- Total Duration: 30 minutes
- Portion Size: Serves 6
- Complexity: Simple
Nutritional Recipe
- Calories per portion: Approximately 340 calories
- Protein: 19 grams
- Carbs: 30 grams
- Fats: 15 grams
- Fiber: 2 grams
- Sugars: 2 grams
- Sodium: 650 mg
Why You’ll Love This Old-Fashioned Tuna Casserole
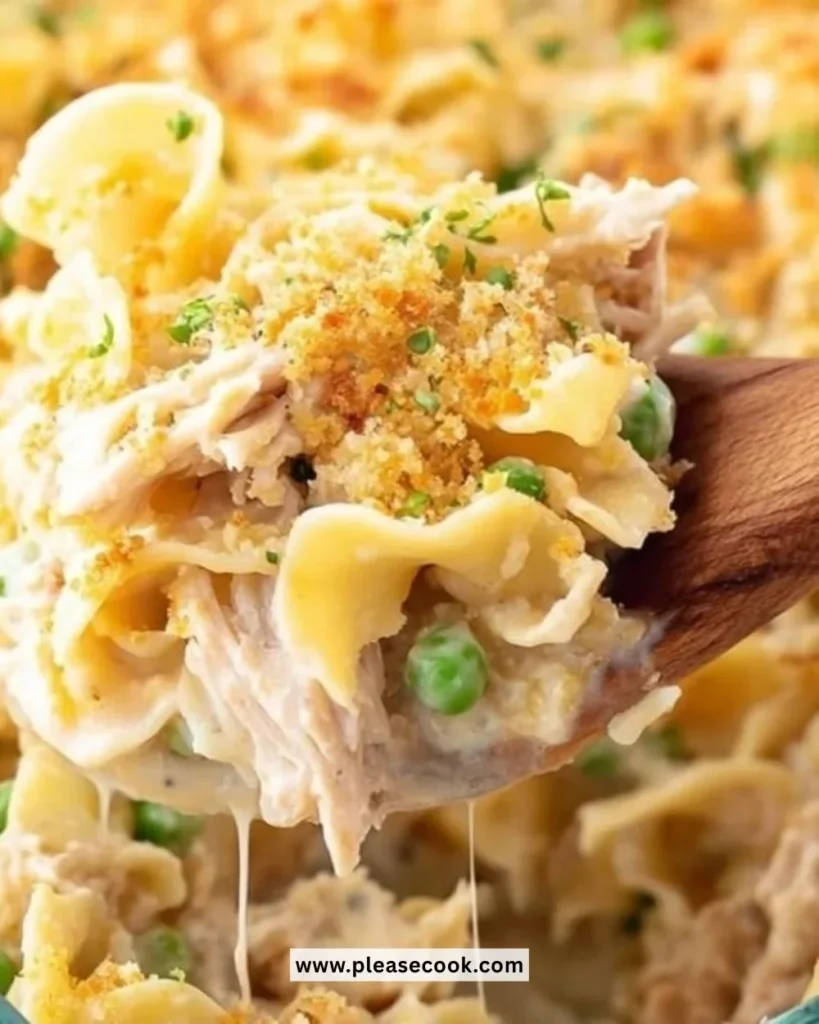
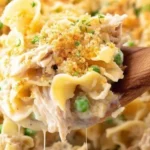
This Old-Fashioned Tuna Casserole is a delightful blend of creamy sauce, tender egg noodles, and scrumptious tuna that speaks to the soul. It’s quick, delicious, and can be made with pantry staples, making it ideal for a busy weeknight dinner. Plus, there’s something satisfying about a dish that can be made from scratch, baked to bubbly perfection, and served straight from the oven. It’s nostalgia on a plate—comfort food that brings families together, evoking sweet memories while creating new ones.
The Complete Cooking Journey
This dish is not just straightforward; it’s a delightful 30-minute journey from start to finish. Imagine collecting the ingredients, from the soft egg noodles to the shredded cheddar cheese, and appreciating the simplicity of combining them. The process invites you to sauté the onions and mushrooms until they’re perfectly tender, and then whisk in the creamy sauce that will envelop each noodle. As you assemble, expect the delightful scent of cheese melting in the oven, coaxing the family to your kitchen. Before you know it, you’ll be sitting down to plates filled with this tasty nostalgia.
Ingredients:
- 2 cups egg noodles
- 1 can tuna, drained
- 1 cup frozen peas
- 1 cup mushrooms, sliced
- 1/2 cup onion, chopped
- 2 cups milk
- 1/4 cup butter
- 1/4 cup flour
- 1 cup cheddar cheese, shredded
- Salt and pepper to taste
- Breadcrumbs for topping (optional)
Method:
Step 1: Preheat the Oven
Preheat your oven to 350°F (175°C). This will ensure it’s warm and ready for baking your casserole, creating that perfect golden topping.
Step 2: Cook the Noodles
Cook the egg noodles according to package instructions until al dente, then drain them. Set them aside and admire your beautiful, fluffy noodles—this is where the heart of your casserole begins!
Step 3: Sauté the Aromatics
In a saucepan, melt butter over medium heat. Add the chopped onion and sliced mushrooms, sautéing until they’re soft and fragrant. This step transforms your kitchen into a comforting haven!
Step 4: Make the Creamy Sauce
Stir in flour and cook for 1-2 minutes. Gradually add milk while stirring constantly, allowing the mixture to thicken into a luscious sauce that’ll coat every lovely noodle.
Step 5: Mix in the Goodness
Toss in the drained tuna and frozen peas, ensuring everything is well combined. This adds a touch of protein and vibrant color to your casserole, making it not only delicious but visually enticing.
Step 6: Combine with Noodles
Gently combine your cooked noodles with this creamy tuna mixture, along with half of the shredded cheese. This is where your dish starts to come together with all its dreamy flavors!
Step 7: Transfer to Casserole Dish
Pour the combined mixture into a greased casserole dish, ensuring you’re creating something special. Top it with the remaining cheese, and sprinkle breadcrumbs on top if you desire a crunchy finish.
Step 8: Bake to Perfection
Bake in the preheated oven for 25-30 minutes until bubbly and golden. Enjoy the anticipation as the delightful aroma fills your home!
Step 9: Serve Hot
Once baked to perfection, remove from the oven, let it cool slightly, then serve hot. The delightful creamy texture combined with melty cheese and crispy topping will have everyone clamoring for seconds!
Serving Suggestions & Pairings
Serve this casserole alongside a fresh green salad dressed in a light vinaigrette and a crusty piece of bread to soak up any leftover sauce. For a cozy evening, pair it with a crisp white wine or a warm herbal tea. Let’s not forget dessert—a slice of warm apple pie would complete this nostalgic meal beautifully!
Storage & Leftovers Guide
Store any leftovers in an airtight container in the refrigerator for up to three days. Reheat gently in the oven or microwave, adding a splash of milk if the casserole appears a bit dry upon reheating.
Kitchen Wisdom & Success Tips
- Make it Ahead: This casserole can be prepared ahead of time and stored in the fridge, ready to pop in the oven when you’re ready to eat!
- Cheese Options: Feel free to mix up the cheeses; Swiss or Gruyère can add an interesting flavor twist.
- Veggie Boost: Add diced bell peppers or spinach for extra vitamins and color.
Flavor Variations & Adaptations
- Seafood Twist: Swap tuna for canned salmon or crab if you want to elevate this classic.
- Gluten-Free Option: Use gluten-free pasta and flour to make this a gluten-friendly dish that everyone can enjoy.
- Herbs & Spices: Experiment with a bit of dill or thyme for a fresh flavor explosion.
Reader Questions & Solutions
-
Can I use fresh instead of frozen peas?
Absolutely! Fresh peas can add a lovely crunch and bright flavor. -
What if I don’t have egg noodles?
Feel free to substitute with any pasta type you have on hand, such as rotini or shell pasta. -
How do I make it creamier?
Increasing the amount of cheese or even adding a dollop of sour cream can boost the creaminess! -
Can I freeze this casserole?
Yes, you can freeze it before or after baking. Just ensure it’s well-wrapped to prevent freezer burn. -
What can I use instead of tuna?
Shredded chicken, cooked shrimp, or a mix of vegetables can also work well for those looking to change it up!
Wrapping Up
There’s something profoundly comforting about throwing together this Old-Fashioned Tuna Casserole, especially as the aroma fills your home and invites everyone to gather. This recipe is more than just a meal; it’s a heartfelt tradition passed down through the years, perfect for today’s families looking for something quick, cozy, and delicious. So grab your ingredients, roll up your sleeves, and let’s make this comforting classic together. Happy cooking!
PrintOld-Fashioned Tuna Casserole
A comforting and nostalgic Old-Fashioned Tuna Casserole that combines creamy sauce, tender noodles, and scrumptious tuna.
- Prep Time: 15 minutes
- Cook Time: 15 minutes
- Total Time: 30 minutes
- Yield: 6 servings 1x
- Category: Main Course
- Method: Baking
- Cuisine: American
- Diet: Pescatarian
Ingredients
- 2 cups egg noodles
- 1 can tuna, drained
- 1 cup frozen peas
- 1 cup mushrooms, sliced
- 1/2 cup onion, chopped
- 2 cups milk
- 1/4 cup butter
- 1/4 cup flour
- 1 cup cheddar cheese, shredded
- Salt and pepper to taste
- Breadcrumbs for topping (optional)
Instructions
- Preheat your oven to 350°F (175°C).
- Cook the egg noodles according to package instructions until al dente, then drain them.
- Sauté the chopped onion and sliced mushrooms in melted butter until soft.
- Stir in flour and cook for 1-2 minutes. Gradually add milk while stirring constantly.
- Toss in the drained tuna and frozen peas, ensuring everything is well combined.
- Combine your cooked noodles with the creamy tuna mixture and half of the shredded cheese.
- Pour the mixture into a greased casserole dish and top with the remaining cheese and breadcrumbs.
- Bake in the preheated oven for 25-30 minutes until bubbly and golden.
- Serve hot, letting everyone enjoy the comforting flavors.
Notes
Store leftovers in an airtight container for up to three days. Reheat gently, adding a splash of milk if needed.
Nutrition
- Serving Size: 1 serving
- Calories: 340
- Sugar: 2g
- Sodium: 650mg
- Fat: 15g
- Saturated Fat: 8g
- Unsaturated Fat: 7g
- Trans Fat: 0g
- Carbohydrates: 30g
- Fiber: 2g
- Protein: 19g
- Cholesterol: 30mg