
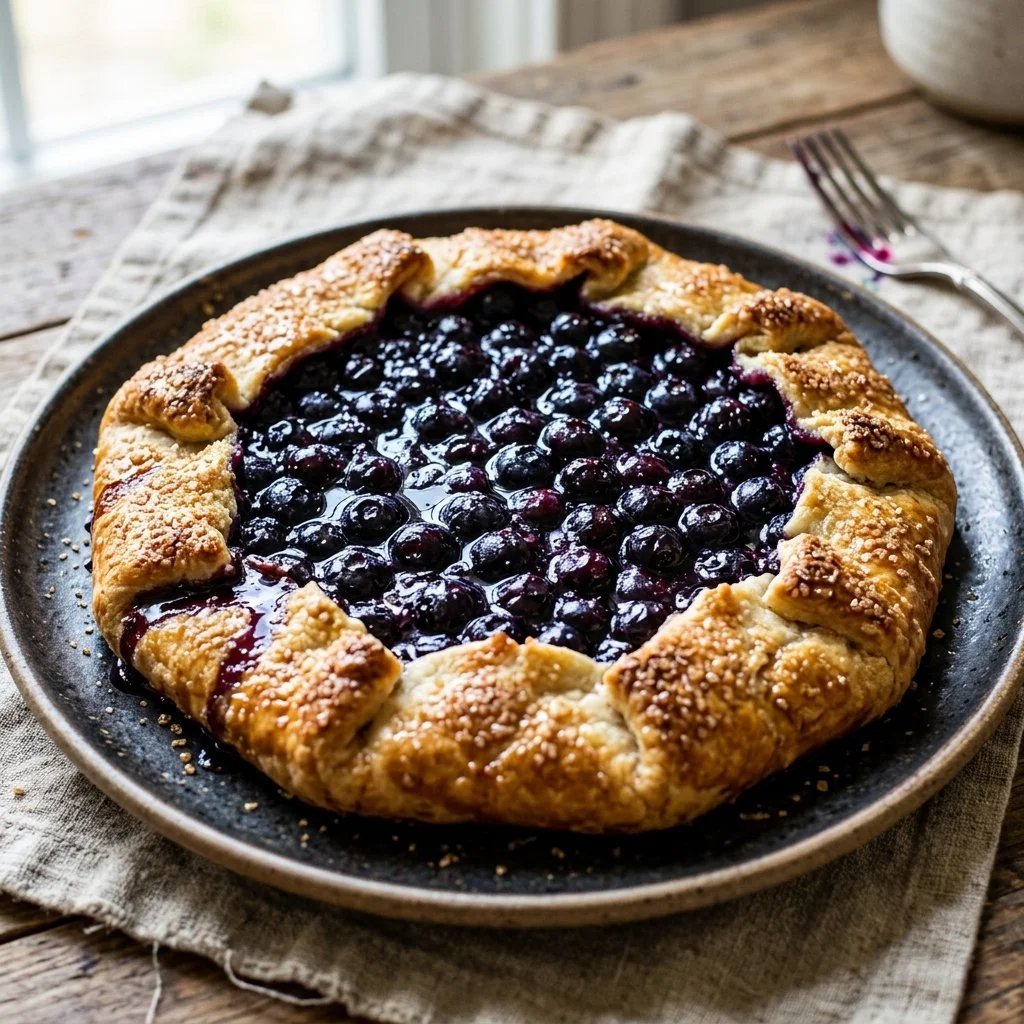
There’s something undeniably magical about the first summer when the blueberries start to bounce back into season. I recall the fragrant mornings spent wandering through the local farm’s berry patch, basket in hand, searching for those sweet, sun-kissed gems, bursting with deep blue hues. The joy of plucking the plumpest berries and feeling the warm sun on my skin is etched in my memory. It feels only fitting to celebrate that bounty with a delightful Blueberry Galette—a rustic yet elegant dessert that honors the juicy blueberries and evokes memories of warm, summer days.
Recipe Timing
- Prep Duration: 20 minutes
- Active Cooking: 30 minutes
- Total Duration: 50 minutes
- Portion Size: serves 4
- Complexity: Simple
Nutritional Recipe
- Calories per portion: approximately 220
- Protein: 3g per serving
- Carbs: 30g per serving
- Fats: 10g per serving
- Fiber: 2g per serving
- Sugars: 8g per serving
- Sodium: 80mg per serving
Why You’ll Love This Blueberry Galette
This Blueberry Galette is the epitome of summer flavors, marrying juicy blueberries with a flaky, buttery crust. The beauty of this dish lies in its simplicity—no fancy molds or complex layers are required. Just fresh ingredients and a little love tossed together for a dessert that feels rustic yet sophisticated. Each bite offers an explosion of flavor from the blueberries and a beautifully baked crust that crumbles effortlessly. It’s exactly the kind of dish you’ll want to serve at picnics, family gatherings, or cozy evenings at home.
The Complete Cooking Journey
Embarking on this journey to create a Blueberry Galette is truly rewarding. You don’t need to be a pastry chef to pull this off—just a love for good food! When you follow each simple step, you’ll find yourself crafting something beautiful and delicious. Each phase of the process, from mixing to baking to finally indulging, is a delightful experience. Are you ready to dive into this flavorful adventure?
Ingredients:
- 2 cups fresh blueberries
- 1 cup all-purpose flour
- 1/4 cup granulated sugar
- 1/4 teaspoon salt
- 6 tablespoons unsalted butter, chilled and diced
- 1/4 cup ice water
- 1 egg, beaten (for egg wash)
Method:
Step 1: Preheat Your Oven
Preheat the oven to 400°F (200°C). A hot oven is essential for creating that perfect flaky crust that we all adore.
Step 2: Prepare the Dry Ingredients
In a bowl, combine the all-purpose flour, granulated sugar, and salt. This is where the foundation of your crust begins!
Step 3: Cut in the Butter
Cut in the chilled and diced butter until the mixture resembles coarse crumbs. You can use a pastry cutter or even your fingers to work the butter into the flour—just don’t overmix!
Step 4: Form the Dough
Gradually stir in the ice water until a dough forms. You want it to be moist but not sticky, ensuring it holds together without falling apart.
Step 5: Roll Out the Dough
On a floured surface, roll out the dough into a rough circle, about 12 inches in diameter. Don’t worry about it being perfect—rustic is the charm!
Step 6: Add the Blueberries
Place the fresh blueberries in the center of your rolled-out dough, leaving a 1-inch border around the edges. Capture the essence of summer with those vibrant berries!
Step 7: Fold and Crimp the Edges
Carefully fold the edges of the dough over the berries, creating a beautiful crust that hugs the filling. This is where the rustic elegance comes into play!
Step 8: Brush with Egg Wash
Brush the exposed edges of the dough with the beaten egg. This step is crucial as it gives the galette that golden-brown shine that’s so inviting.
Step 9: Bake to Perfection
Bake in the preheated oven for 25-30 minutes or until the crust is golden brown and the blueberries are bubbly. The sweet aroma filling your kitchen will be irresistible!
Step 10: Cool and Serve
Let the galette cool slightly before slicing and serving. The perfect way to enjoy it is slightly warm, perhaps with a scoop of vanilla ice cream or a dollop of whipped cream.
Serving Suggestions & Pairings
This Blueberry Galette shines on its own, but pair it with a scoop of homemade vanilla ice cream or a dollop of fresh whipped cream for a dessert that truly sings. Accompany it with a light, refreshing lemonade or a glass of sweet iced tea for that perfect summertime vibe.
Storage & Leftovers Guide
If you happen to have leftovers (which is rare!), store the galette in an airtight container at room temperature for up to 2 days. You can also refrigerate it for up to a week. To reheat, place it in a warm oven for a few minutes—you’ll want to revive that lovely crust!
Kitchen Wisdom & Success Tips
- Use Fresh Berries: For the best flavor, use fresh blueberries in-season. If you’re using frozen ones, make sure to thaw and drain them to avoid excess moisture.
- Chill Your Tools: Keep your butter and even your mixing bowl chill to ensure that your crust turns out flaky.
- Don’t Overwork the Dough: Handling the dough too much can lead to a tough crust. Mix just until combined!
Flavor Variations & Adaptations
Feel free to switch things up! For a different flavor profile, add a pinch of cinnamon or nutmeg to the filling, or incorporate mixed berries like raspberries or blackberries. You can even try a sprinkle of lemon zest for a zesty twist.
Reader Questions & Solutions
1. What if my dough is too crumbly?
If your dough seems too dry, add a tiny bit more ice water—just a tablespoon at a time—until it comes together.
2. Can I use frozen blueberries?
Yes, but make sure to thaw them and drain excess juice, or you’ll have a soggy galette!
3. How do I keep the crust from getting soggy?
Ensure the filling is not overly wet, and consider baking it on a pizza stone for crispy results.
4. Is there a gluten-free option?
Absolutely! Use a gluten-free all-purpose flour blend and follow the same steps.
5. Can I make the dough ahead of time?
Definitely! You can make the dough ahead of time and refrigerate it for up to 2 days, or freeze it for a month.
Wrapping Up
So, there you have it—the recipe for a delightful Blueberry Galette that not only captures the essence of summer but also brings warmth to any table. Dive into this easy, delicious dessert, and let the flavors and memories wash over you. I encourage you to gather your loved ones around and share this treat. Happy baking, and may every bite remind you of the beauty of ripe blueberries and carefree summer days!
PrintBlueberry Galette

A rustic yet elegant Blueberry Galette that celebrates the bounty of summer with juicy blueberries and a flaky crust.
- Prep Time: 20 minutes
- Cook Time: 30 minutes
- Total Time: 50 minutes
- Yield: 4 servings 1x
- Category: Dessert
- Method: Baking
- Cuisine: American
- Diet: Vegetarian
Ingredients
- 2 cups fresh blueberries
- 1 cup all-purpose flour
- 1/4 cup granulated sugar
- 1/4 teaspoon salt
- 6 tablespoons unsalted butter, chilled and diced
- 1/4 cup ice water
- 1 egg, beaten (for egg wash)
Instructions
- Preheat the oven to 400°F (200°C).
- Combine the all-purpose flour, granulated sugar, and salt.
- Cut in the chilled and diced butter until the mixture resembles coarse crumbs.
- Stir in the ice water until a dough forms.
- Roll out the dough into a rough circle, about 12 inches in diameter.
- Place the fresh blueberries in the center, leaving a 1-inch border.
- Fold the edges of the dough over the berries.
- Brush the edges of the dough with the beaten egg.
- Bake for 25-30 minutes or until golden brown.
- Cool slightly before slicing and serving.
Notes
For a delicious pairing, serve with vanilla ice cream or fresh whipped cream.
Nutrition
- Serving Size: 1 serving
- Calories: 220
- Sugar: 8g
- Sodium: 80mg
- Fat: 10g
- Saturated Fat: 6g
- Unsaturated Fat: 4g
- Trans Fat: 0g
- Carbohydrates: 30g
- Fiber: 2g
- Protein: 3g
- Cholesterol: 30mg


