
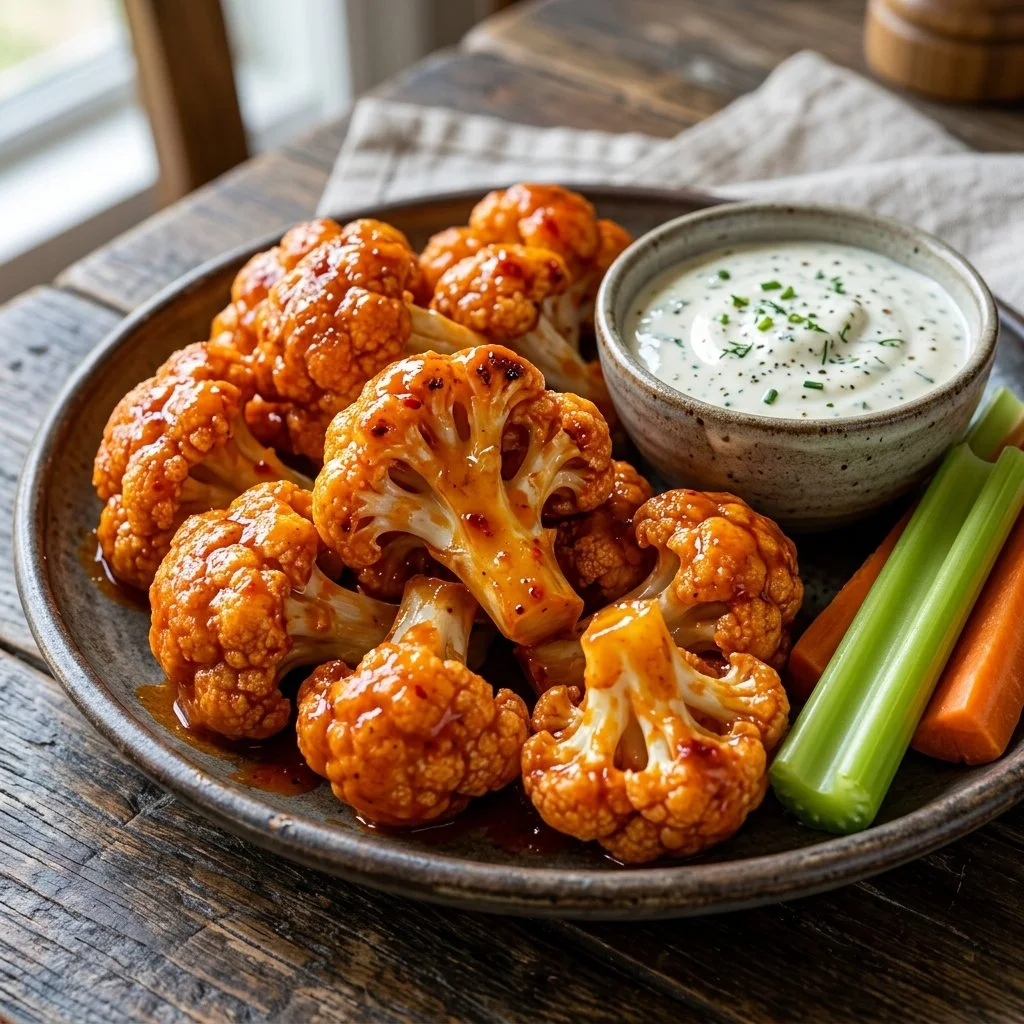
There’s something undeniably magical about how a humble head of cauliflower can transform into a finger-licking feast when bathed in spicy buffalo sauce. It reminds me of cozy game nights gathered around the living room, where laughter and cheers for our favorite teams blend seamlessly with the mouthwatering aroma wafting from the kitchen. My journey into the world of cauliflower wings was sparked by a friend’s recommendation — “Trust me, they taste just like the real thing!” She exclaimed, and let me tell you, she was right!
Buffalo Cauliflower Wings have claimed a rightful spot in my recipe repertoire, and for good reason. Not only are they a fantastic appetizer or snack, but they also bring a delightful crunch and an explosion of flavor without all the heaviness. Perfect for friends, family, or just yourself during a cozy movie night, these wings are a crowd-pleaser. Let’s dive into making this scrumptious dish!
Recipe Timing
- Prep Duration: 15 minutes
- Active Cooking: 30 minutes
- Total Duration: 45 minutes
- Portion Size: Serves 4
- Complexity: Simple
Nutritional Recipe
- Calories per portion: Approximately 160
- Protein: 3g per serving
- Carbs: 24g per serving
- Fats: 6g per serving (if using butter)
- Fiber: 3g per serving
- Sugars: 1g per serving
- Sodium: 800mg per serving
Why You’ll Love This Buffalo Cauliflower Wings
Picture this: crispy, spicy, and utterly addictive bites that are perfect for dipping into creamy ranch dressing or cooling celery sticks. These Buffalo Cauliflower Wings are a flavorful option for those looking to indulge without the guilt. Plus, they cater to a variety of diets—vegan, gluten-free, or just plain deliciousness that everyone can enjoy. Each bite is bursting with tangy flavor and a satisfying crunch, a perfect balance that will have your taste buds dancing with delight!
The Complete Cooking Journey
Let’s embark on this crispy adventure together! In just a short time, you’ll have a batch of Buffalo Cauliflower Wings ready to dazzle everyone at your table. With easy-to-follow steps and no need for any specialized techniques, you’ll feel like a kitchen rockstar by the end of it!
Ingredients:
- 1 head cauliflower, cut into bite-sized florets
- 1 cup all-purpose flour
- 1 cup water
- 1 teaspoon garlic powder
- 1 teaspoon onion powder
- 1 teaspoon paprika
- Salt and pepper to taste
- 1 cup buffalo sauce
- 2 tablespoons melted butter (optional)
- Celery sticks and ranch dressing for serving
Method:
Step 1: Preheat the Oven
Preheat the oven to 450°F (230°C) and line a baking sheet with parchment paper. This is where the magic will happen, so get your kitchen ready!
Step 2: Prepare the Batter
In a bowl, whisk together the flour, water, garlic powder, onion powder, paprika, salt, and pepper to create a smooth batter. This will be the coat that makes your cauliflower wings crispy and flavorful.
Step 3: Coat the Cauliflower
Dip each cauliflower floret into the batter, ensuring it’s well coated but allowing any excess to drip off. Place them carefully on the prepared baking sheet, making sure they’ve got a little space around them for that airy crispiness.
Step 4: Initial Baking
Bake in the preheated oven for about 20 minutes, or until the florets are golden brown and crispy. This step is crucial for that delightful crunch.
Step 5: Prep the Buffalo Sauce
In a separate bowl, mix the buffalo sauce with melted butter if you’re using it. This not only adds richness but also enhances the flavors of the sauce.
Step 6: Toss in Sauce
Remove the cauliflower from the oven and toss them thoroughly in the buffalo sauce until they’re nicely coated. Get ready for a flavor explosion!
Step 7: Final Bake
Return the sauced cauliflower to the oven and bake for an additional 10 minutes. This will give them an even deeper color and a delicious caramelization of the sauce.
Step 8: Serve and Enjoy!
Serve hot with crunchy celery sticks and creamy ranch dressing, and prepare for oohs and aahs around the table!
Serving Suggestions & Pairings
These Buffalo Cauliflower Wings pair beautifully with a crisp salad, loaded nachos, or even alongside classic buffalo chicken tenders for those who want a mix of both worlds. Don’t forget the drinks — a cold craft beer or a refreshing iced tea would complement the spiciness perfectly.
Storage & Leftovers Guide
If you find yourself with leftovers (though that’s often a rarity), store them in an airtight container in the fridge for up to 3 days. Reheat in the oven, not the microwave, to retain that crispy texture.
Kitchen Wisdom & Success Tips
- Feel free to adjust the spices in the batter to suit your taste — a little cayenne can add extra heat.
- For a gluten-free version, substitute the all-purpose flour with a gluten-free blend.
- Keep an eye on the cauliflower during the final bake; different ovens can vary in cooking time.
Flavor Variations & Adaptations
Want to switch it up? Try using different sauces! Sweet chili sauce, teriyaki glaze, or even a smoky barbecue sauce can give these wings a whole new personality. Experiment and find your favorite!
Reader Questions & Solutions
-
Can I use frozen cauliflower instead of fresh?
- Yes, though fresh is preferred for the best texture! If using frozen, just ensure they’re thawed and pat them dry.
-
What can I use instead of buffalo sauce?
- You can use any kind of hot sauce you like, or even make your own sweet and spicy sauce for a unique twist.
-
How can I make them spicier?
- Add a splash of hot sauce directly into the batter or sprinkle cayenne pepper for an extra kick!
-
What if I want to make them vegan?
- Simply leave out the melted butter and use a dairy-free ranch dressing.
-
Can I bake them ahead of time?
- Yes! You can bake them, let them cool, and then store them in the refrigerator. Just reheat them in the oven to get crispy again.
Wrapping Up
This recipe for Buffalo Cauliflower Wings is more than just a dish; it’s an experience. From the moment that first crisp floret meets your taste buds to the joyful gathering of friends around the table, it brings people together with the magic of food. So, roll up your sleeves, gather your ingredients, and let the delicious fun begin. Enjoy every spicy bite!
PrintBuffalo Cauliflower Wings

Crispy and spicy buffalo cauliflower wings, perfect for game nights or cozy gatherings.
- Prep Time: 15 minutes
- Cook Time: 30 minutes
- Total Time: 45 minutes
- Yield: 4 servings 1x
- Category: Appetizer
- Method: Baking
- Cuisine: American
- Diet: Vegan
Ingredients
- 1 head cauliflower, cut into bite-sized florets
- 1 cup all-purpose flour
- 1 cup water
- 1 teaspoon garlic powder
- 1 teaspoon onion powder
- 1 teaspoon paprika
- Salt and pepper to taste
- 1 cup buffalo sauce
- 2 tablespoons melted butter (optional)
- Celery sticks and ranch dressing for serving
Instructions
- Preheat the oven to 450°F (230°C) and line a baking sheet with parchment paper.
- Whisk together the flour, water, garlic powder, onion powder, paprika, salt, and pepper to create a smooth batter.
- Dip each cauliflower floret into the batter, ensuring it’s well coated.
- Bake in the preheated oven for 20 minutes, or until the florets are golden brown and crispy.
- Mix the buffalo sauce with melted butter if using.
- Toss the cauliflower in the buffalo sauce until nicely coated.
- Return the sauced cauliflower to the oven and bake for an additional 10 minutes.
- Serve hot with celery sticks and ranch dressing.
Notes
For a gluten-free version, substitute all-purpose flour with a gluten-free blend. Adjust spices to suit your taste.
Nutrition
- Serving Size: 1 serving
- Calories: 160
- Sugar: 1g
- Sodium: 800mg
- Fat: 6g
- Saturated Fat: 1g
- Unsaturated Fat: 2g
- Trans Fat: 0g
- Carbohydrates: 24g
- Fiber: 3g
- Protein: 3g
- Cholesterol: 0mg


