
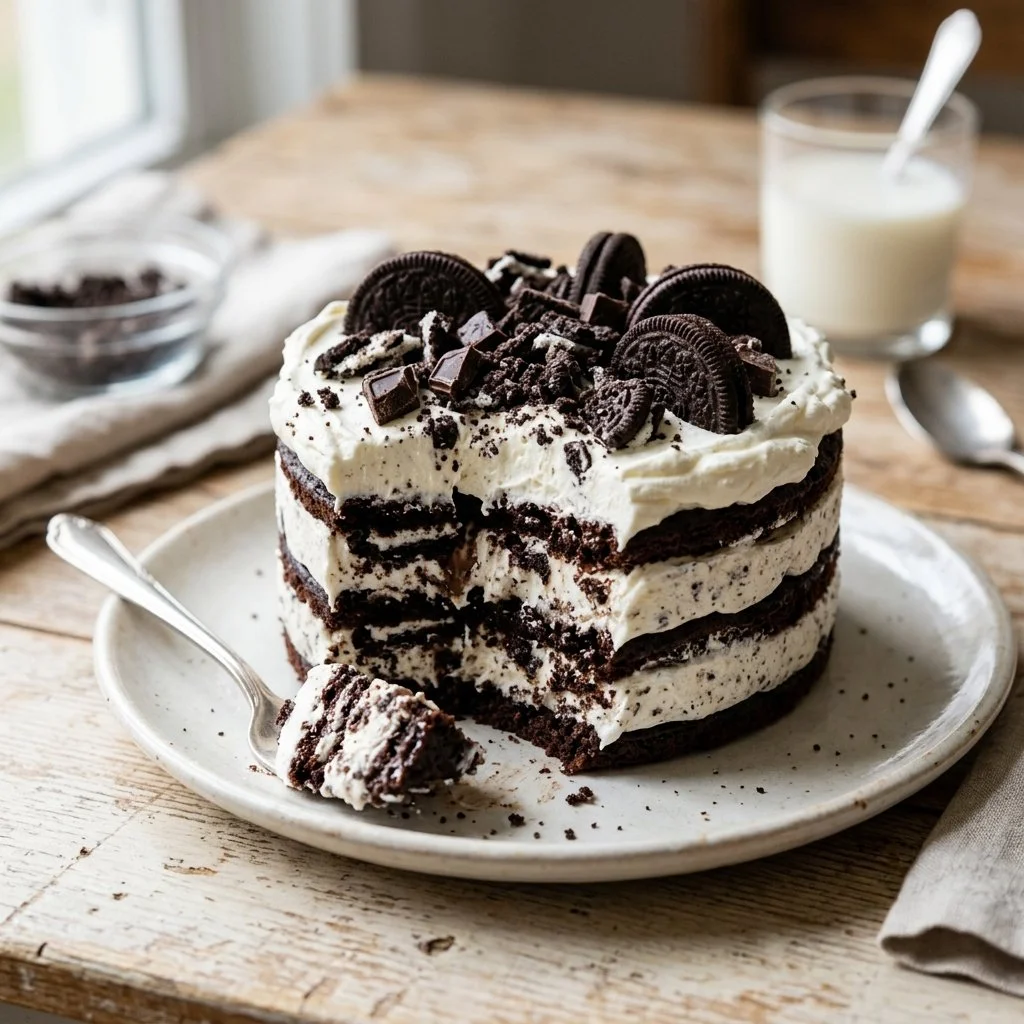
There’s something magical about desserts that evoke childhood memories, bringing us back to sunny afternoons filled with laughter and shared treats. I remember the first time I sunk my teeth into an Oreo Icebox Cake. The moment the creamy layers melted in my mouth, I was transported back to my grandmother’s kitchen, where no gathering was complete without her no-bake desserts. This cake, with its smooth layers of whipped cream and cookie crunch, not only satisfies a sweet tooth but also ignites nostalgia.
Recipe Timing
- Prep Duration: 20 minutes
- Active Cooking: 0 minutes (no baking!)
- Total Duration: 4 hours (or overnight for best results)
- Portion Size: Serves 8
- Complexity: Simple
Nutritional Recipe
- Calories per portion: 320
- Protein: 3g per serving
- Carbs: 45g per serving
- Fats: 15g per serving
- Fiber: 1g per serving
- Sugars: 24g per serving
- Sodium: 130mg per serving
Why You’ll Love This Oreo Icebox Cake
This Oreo Icebox Cake embraces simplicity and indulgence in equal measure. It’s perfect for gatherings, potlucks, or just indulging on a quiet weeknight. With minimal prep required, it’s the kind of dessert that allows you to spend less time in the kitchen and more time enjoying the company of friends and family. Each layer reveals rich, creamy whipped topping and crunchy Oreo goodness that’s utterly addicting. There’s no need to turn on the oven, making it a lifesaver during hot summer months.
The Complete Cooking Journey
Transforming a simple collection of ingredients into an impressive dessert is a joy, and with the Oreo Icebox Cake, it couldn’t be easier. Each step is straightforward, and before you know it, you’ll have a luscious cake waiting in your fridge, growing more delicious as it sets.
Ingredients:
- 1 package of Oreo cookies
- 1 cup of heavy cream
- 1 cup of powdered sugar
- 1 teaspoon of vanilla extract
- 2 cups of milk
Method:
Step 1: Whipping the Cream
In a large bowl, whip the heavy cream with the powdered sugar and vanilla extract until soft peaks form. This is where the magic begins as the mixture transforms into a fluffy cloud of sweetness.
Step 2: Dipping the Oreos
Dip each Oreo cookie in milk for just a second, ensuring that the cookies soak up a little moisture without becoming soggy. Layer them in a rectangular dish, covering the bottom.
Step 3: Spreading the Whipped Cream
Spread a generous layer of the whipped cream mixture over the Oreos, creating a dreamy layer of cream that will complement the crunch of the cookies.
Step 4: Building Layers
Repeat the layers of dipped Oreos and whipped cream until you finish with a final luxurious layer of whipped cream on top. Feel free to get creative with your layering – thick or thin, it’s all delicious!
Step 5: Refrigeration
Refrigerate for at least 4 hours or overnight to set. This step is crucial as it allows the flavors to meld and the cake to firm up into a delightful treat.
Step 6: Serving Chill
Serve chilled and enjoy! Cut into squares and watch as your friends and family dive into this dessert with delight.
Serving Suggestions & Pairings
This icebox cake pairs beautifully with fresh berries or a drizzle of chocolate sauce. Consider serving it alongside a scoop of vanilla or mint ice cream for a refreshing treat, or even with a side of hot coffee or tea for a cozy dessert experience.
Storage & Leftovers Guide
Leftover Oreo Icebox Cake should be covered tightly with plastic wrap or stored in an airtight container in the refrigerator. It will last for about 3-4 days. Be warned, though: chances are, it won’t stick around that long!
Kitchen Wisdom & Success Tips
- Tip for Success: Make sure your heavy cream is cold before whipping; it whips up faster and holds its shape better.
- Double the Recipe: If you’re expecting a crowd, doubling the recipe is a smart move.
- No Milk Substitute: If you don’t have milk on hand, almond milk or even coffee can work for dipping!
Flavor Variations & Adaptations
Feel free to swap regular Oreos for double-stuffed, mint-flavored, or even peanut butter Oreos for a fun twist on this classic recipe. Crushed nuts or chocolate chips can also be layered in for added texture. Need gluten-free? Use gluten-free cookies instead!
Reader Questions & Solutions
-
Can I make this without heavy cream?
Yes! You can substitute with store-bought whipped topping, just keep in mind the texture will differ slightly. -
How can I avoid soggy cookies?
A quick dip in the milk is key. Just a second or two should suffice! -
Can this be made ahead of time?
Absolutely! It’s best left to set overnight, making it a perfect option for meal prepping. -
What if I don’t have a rectangular dish?
You can use any dish you have on hand! Just make sure it’s deep enough for the layers. -
Does it matter what type of milk I use?
You can use any kind of milk—dairy or non-dairy! Just adjust the soak time based on the cookie’s absorbency.
Wrapping Up
Creating an Oreo Icebox Cake is more than just following a recipe; it’s about connecting with memories and making new ones. Whether it’s a family gathering or a quiet night in, this dessert promises joy in every bite. Grab a pack of Oreos and whip up this delightful cake—you won’t regret it! So go ahead, embrace your inner baker, and get ready to enjoy the sweet rewards of your efforts. Happy baking!
PrintOreo Icebox Cake
A nostalgic no-bake dessert featuring layers of creamy whipped topping and crunchy Oreo cookies, perfect for gatherings or indulging at home.
- Prep Time: 20 minutes
- Cook Time: 0 minutes
- Total Time: 240 minutes
- Yield: 8 servings 1x
- Category: Dessert
- Method: No-Bake
- Cuisine: American
- Diet: Vegetarian
Ingredients
- 1 package of Oreo cookies
- 1 cup of heavy cream
- 1 cup of powdered sugar
- 1 teaspoon of vanilla extract
- 2 cups of milk
Instructions
- Whip the heavy cream with the powdered sugar and vanilla extract until soft peaks form.
- Dip each Oreo cookie in milk for just a second.
- Spread a layer of the whipped cream mixture over the dipped Oreos.
- Repeat the layers of dipped Oreos and whipped cream until finished.
- Refrigerate for at least 4 hours or overnight to set.
- Serve chilled, cut into squares.
Notes
Make sure your heavy cream is cold before whipping for the best results. Leftovers can last 3-4 days in the refrigerator.
Nutrition
- Serving Size: 1 serving
- Calories: 320
- Sugar: 24g
- Sodium: 130mg
- Fat: 15g
- Saturated Fat: 9g
- Unsaturated Fat: 5g
- Trans Fat: 0g
- Carbohydrates: 45g
- Fiber: 1g
- Protein: 3g
- Cholesterol: 10mg


