
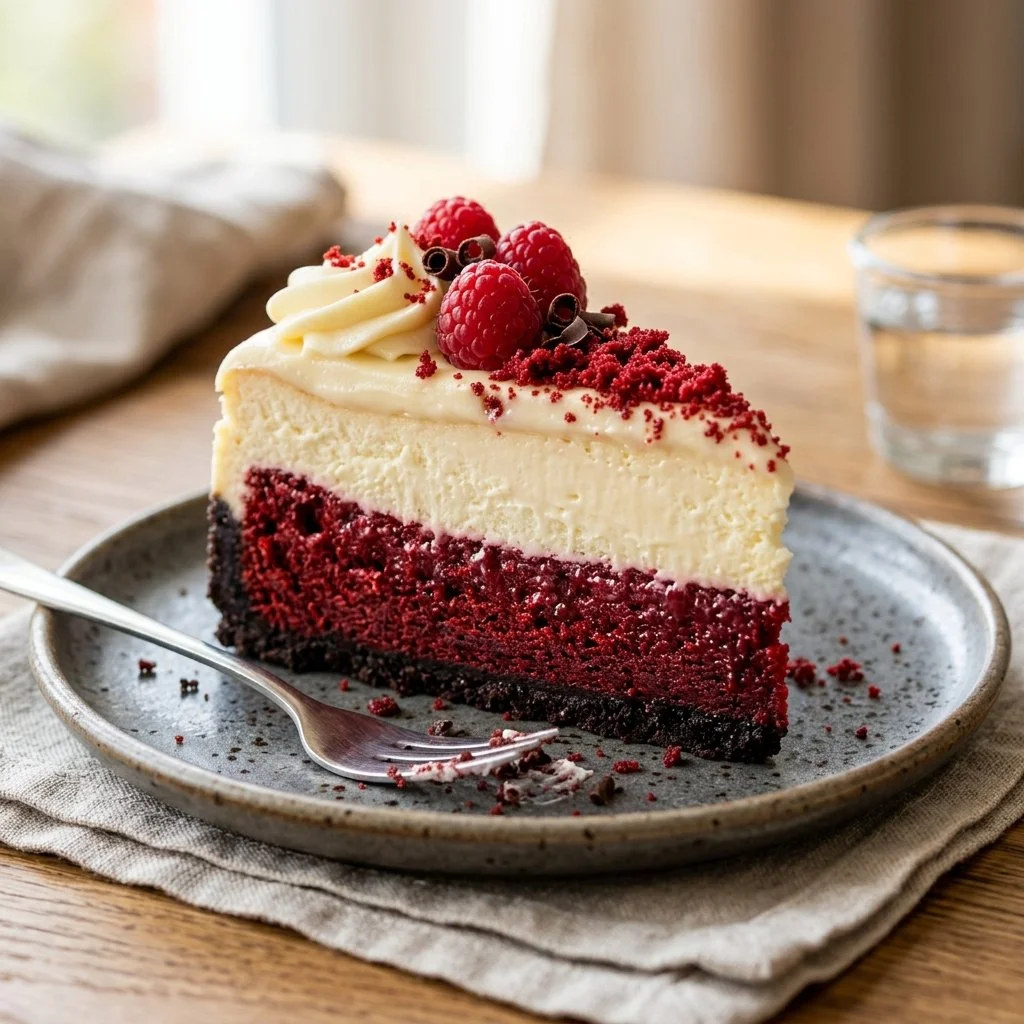
There’s something magical about the combination of rich chocolate, velvety smooth cream cheese, and the crimson hue of red velvet. Growing up, my weekends were often filled with the enticing aroma of baking wafting through our home, thanks to my grandmother’s signature recipes. Among all of her delightful creations, the Red Velvet Cheesecake holds a special place in my heart. Its distinctive blend of flavors and textures makes it a showstopper that can turn any ordinary gathering into a festive celebration. The first bite transports me to a time filled with laughter, family stories, and the warm feeling of home. Today, I can’t wait to share this indulgent treat with you!
Recipe Timing
- Prep Duration: 20 minutes
- Active Cooking: 10 minutes
- Total Duration: 1 hour 10 minutes (plus refrigeration)
- Portion Size: Serves 8-10
- Complexity: Moderate
Nutritional Recipe
- Calories per Portion: Approximately 420
- Protein: 7 grams
- Carbs: 29 grams
- Fats: 32 grams
- Fiber: 1 gram
- Sugars: 20 grams
- Sodium: 220 mg
Why You’ll Love This Red Velvet Cheesecake
This Red Velvet Cheesecake is more than just a dessert; it’s a feast for the senses! The combination of the rich, creamy filling and the crumbly red velvet crust creates a luxurious contrast that leaves everyone wanting more. Its stunning color makes it perfect for festive occasions, while the flavor balance will keep your guests talking long after the last slice is gone. Plus, it’s surprisingly simple to make, allowing you to unleash your inner baker without feeling overwhelmed.
The Complete Cooking Journey
As you embark on your culinary adventure, gather your flavors and let’s dive into the process of creating this exquisite dessert. It’s a step-by-step journey where patience turns the simplest ingredients into a sensational cheesecake.
Ingredients:
- 2 cups of red velvet cake crumbs
- 1 cup of cream cheese, softened
- 1/2 cup of sugar
- 1 teaspoon of vanilla extract
- 2 large eggs
- 1 cup of sour cream
- 1/4 cup of cocoa powder
- 1/4 cup of flour
- 1/2 cup of heavy cream
Method:
Step 1: Preheat and Prepare
Preheat the oven to 325°F (163°C). Grease a 9-inch springform pan to ensure your cheesecake releases easily once baked.
Step 2: Make the Crust
In a mixing bowl, combine the red velvet cake crumbs with melted butter, mixing until the crumbs are evenly coated. Press this mixture firmly into the bottom of the prepared springform pan to form a solid crust.
Step 3: Cream the Cheese
In another bowl, beat the softened cream cheese with the sugar until smooth and creamy. Then, add the eggs one at a time, making sure to mix well after each addition to create a silky texture.
Step 4: Combine Creamy Goodness
Stir in the vanilla extract, sour cream, cocoa powder, and flour until the mixture is perfectly smooth and well-blended. This is where that luscious filling starts to take shape!
Step 5: Assemble the Cheesecake
Pour the rich cheesecake filling over the crust in the springform pan, spreading it out evenly.
Step 6: Bake to Perfection
Bake the cheesecake for 60-70 minutes until it is set and the edges look firm. The center may still jiggle slightly, which is completely fine!
Step 7: Chill and Serve
Once baked, let it cool at room temperature for a bit before refrigerating for at least 4 hours, or overnight if you can resist! The chilling process is essential to the texture and flavor.
Serving Suggestions & Pairings
Serve your Red Velvet Cheesecake with a dollop of whipped cream and a dusting of cocoa powder for that elegant touch. It pairs beautifully with a rich cup of coffee or a glass of sweet dessert wine, making it perfect for celebrations or a cozy evening treat. Garnish with fresh berries or chocolate shavings for an extra layer of indulgence.
Storage & Leftovers Guide
Store any leftovers in the refrigerator, covered tightly in plastic wrap or in an airtight container. It will keep well for up to a week (if it lasts that long!) Enjoy the delightful surprise of having this yummy treat on hand for guests or midnight snack cravings.
Kitchen Wisdom & Success Tips
- Ensure your cream cheese is softened; this will help prevent lumps in your filling and achieve a creamy texture.
- For the crust, if you don’t have red velvet cake crumbs, you can use crushed chocolate cookies or graham crackers.
- If the top of your cheesecake cracks while baking, don’t worry! A simple dusting of cocoa powder or a drizzle of ganache can hide those imperfections beautifully.
Flavor Variations & Adaptations
Feel free to get inventive! Add some white chocolate chips to the filling for a sweet surprise or explore the addition of a hint of espresso for a mocha twist. For a tangy kick, consider incorporating some lemon zest into the cream cheese mixture.
Reader Questions & Solutions
-
Why did my cheesecake crack?
A crack often happens due to rapid temperature changes. To prevent this, bake your cheesecake in a water bath, or keep the oven door closed when the cheesecake is baking to maintain a consistent temperature. -
Can I use low-fat cream cheese?
Yes, but remember that low-fat cream cheese can affect the texture and richness. The cheesecake may be less creamy, but it will still taste delicious! -
What if I can’t find red velvet cake crumbs?
You can easily make your own by crumbling a store-bought red velvet cake or using crushed chocolate cookies or graham crackers as an alternative crust. -
Can I freeze the cheesecake?
Absolutely! Wrap it tightly in plastic wrap, then foil, and it can be frozen for up to 3 months. Thaw overnight in the refrigerator before serving. -
How can I tell when the cheesecake is done baking?
The edges should be set and firm while the center remains slightly jiggly. It will firm up as it cools.
Wrapping Up
Creating this Red Velvet Cheesecake is not just about making a dessert; it’s about crafting memories and indulging in flavors that bring joy. Whether you’re serving it for a birthday, holiday, or simply because, it always makes the moment just a little sweeter. So gather your ingredients, put on your favorite playlist, and let your kitchen come alive with the spirit of baking. Enjoy every bite and the smiles it brings!
PrintRed Velvet Cheesecake
A decadent Red Velvet Cheesecake with a rich cream cheese filling and a crumbly crust, perfect for any celebration.
- Prep Time: 20 minutes
- Cook Time: 70 minutes
- Total Time: 70 minutes
- Yield: 8-10 servings 1x
- Category: Dessert
- Method: Baking
- Cuisine: American
- Diet: Vegetarian
Ingredients
- 2 cups of red velvet cake crumbs
- 1 cup of cream cheese, softened
- 1/2 cup of sugar
- 1 teaspoon of vanilla extract
- 2 large eggs
- 1 cup of sour cream
- 1/4 cup of cocoa powder
- 1/4 cup of flour
- 1/2 cup of heavy cream
Instructions
- Preheat the oven to 325°F (163°C). Grease a 9-inch springform pan.
- Combine the red velvet cake crumbs with melted butter in a mixing bowl.
- Press this mixture into the bottom of the prepared springform pan to form a crust.
- Beat the softened cream cheese with the sugar until smooth and creamy.
- Add the eggs one at a time, mixing well after each addition.
- Stir in the vanilla extract, sour cream, cocoa powder, and flour until smooth.
- Pour the cheesecake filling over the crust in the springform pan.
- Bake for 60-70 minutes until set; the center may jiggle slightly.
- Cool at room temperature before refrigerating for at least 4 hours.
Notes
Serve with whipped cream and cocoa powder. Pairs well with coffee or dessert wine.
Nutrition
- Serving Size: 1 slice
- Calories: 420
- Sugar: 20g
- Sodium: 220mg
- Fat: 32g
- Saturated Fat: 18g
- Unsaturated Fat: 14g
- Trans Fat: 0g
- Carbohydrates: 29g
- Fiber: 1g
- Protein: 7g
- Cholesterol: 150mg


