
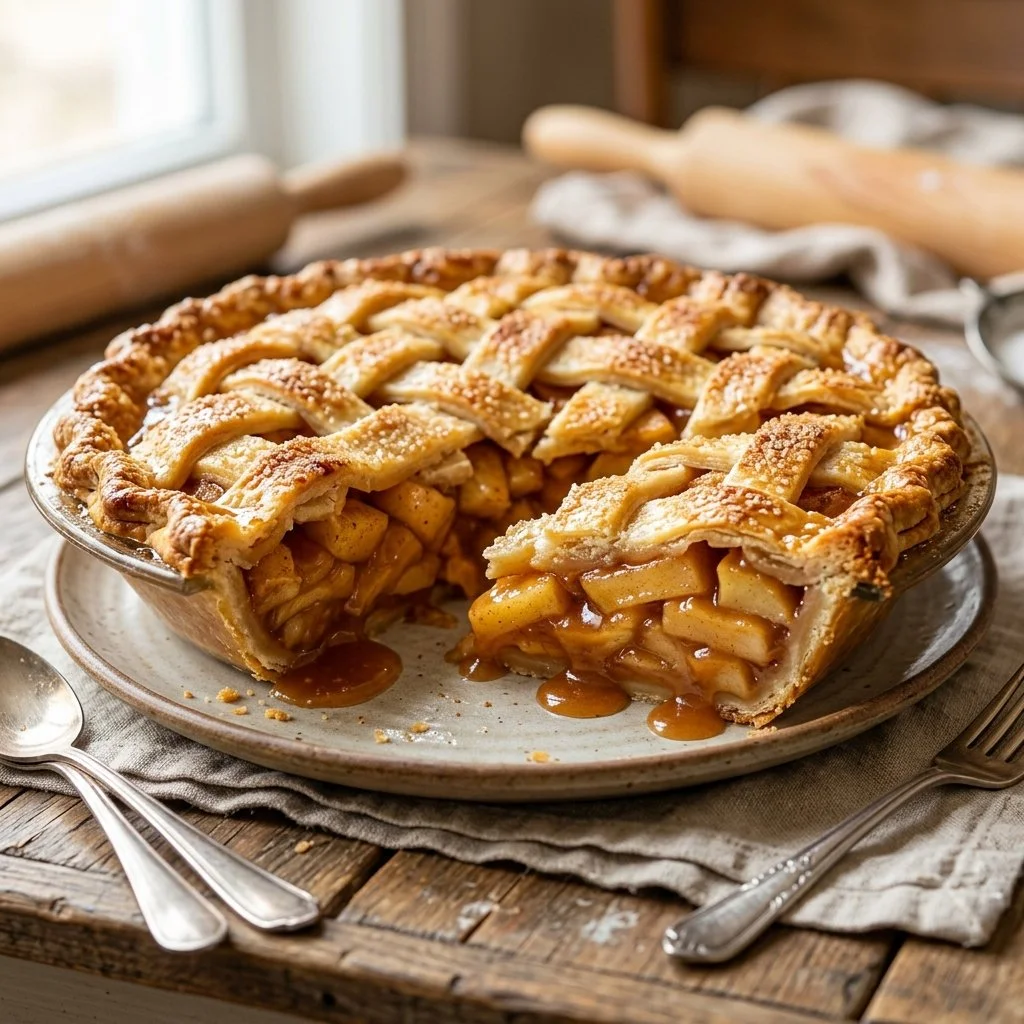
There’s something undeniably comforting about the aroma of an apple pie baking in the oven. As the fragrant harmony of cinnamon, sugar, and warm apples wafts through the house, it awakens childhood memories of autumn afternoons spent at Grandma’s kitchen table. I remember the way her smile would widen as she pulled the pie from the oven, the steam swirling around like a delicious invitation. That iconic golden crust, slightly cracked open to reveal the bubbling apple filling beneath, felt like a warm embrace, and every bite was a sweet reminder of home.
In my own kitchen, I strive to recreate that feeling with each apple pie I bake. It’s more than just a dessert; it’s a way to connect with my loved ones and share a slice of nostalgia. So grab your favorite pie dish and roll up your sleeves—it’s time to whip up a classic apple pie that will fill your home with warmth and joy!
Recipe Timing
- Prep Duration: 20 minutes
- Active Cooking: 1 hour
- Total Duration: 1 hour 20 minutes
- Portion Size: 8 slices
- Complexity: Simple
Nutritional Recipe
- Calories per portion: Approximately 250
- Protein: 2g
- Carbs: 36g
- Fats: 12g
- Fiber: 2g
- Sugars: 15g
- Sodium: 150mg
Why You’ll Love This Apple Pie
This apple pie is a delightful fusion of tart and sweet flavors, with tender apples enveloped in a flaky crust. The hint of lemon juice adds a refreshing brightness, while cinnamon and nutmeg provide the quintessential warmth that defines a perfect autumn dessert. What’s more, it’s incredibly straightforward to make, allowing home cooks of all levels to achieve that beloved bakery-quality result. Whether enjoyed warm with a scoop of vanilla ice cream or at room temperature with a cup of coffee, this apple pie is bound to become a cherished favorite in your household.
The Complete Cooking Journey
Let’s embark on this culinary adventure together, from selecting the freshest apples to the final golden crust emerging from the oven. Each step is infused with love and care, transforming the simplest ingredients into something truly magical.
Ingredients:
- 6 to 8 apples, peeled, cored, and sliced
- 3/4 cup sugar
- 2 tablespoons all-purpose flour
- 1 teaspoon cinnamon
- 1/4 teaspoon nutmeg
- 1 tablespoon lemon juice
- 1 tablespoon butter, divided
- 1 package refrigerated pie crusts (2 crusts)
- 1 egg (optional, for egg wash)
Method:
Step 1: Preheat the Oven
Start by preheating your oven to 425°F (220°C). This high temperature will help create that beautifully golden crust.
Step 2: Prepare the Apple Filling
In a large bowl, combine the sliced apples with sugar, flour, cinnamon, nutmeg, and lemon juice. Toss everything gently to ensure the apples are evenly coated.
Step 3: Lay the Base
Roll out one pie crust and fit it into a pie dish. Make sure to press it gently against the sides and trim the excess crust hanging over.
Step 4: Fill the Pie
Pour the prepared apple mixture into the pie crust, arranging the apples for an even look. Dot the filling with small pieces of butter to add richness.
Step 5: Top It Off
Roll out the second pie crust and lay it over the apple filling. Seal the edges by crimping or fluting them with your fingers to create an attractive look.
Step 6: Vent the Pie
Cut slits in the top crust to allow steam to escape while it bakes—this is crucial for preventing any sogginess.
Step 7: Add a Touch of Shine
For an optional touch of elegance, brush the top crust with a beaten egg. This creates a gorgeous golden finish as it bakes.
Step 8: Start Baking
Place the pie in your preheated oven and bake for 15 minutes. Then, reduce the temperature to 350°F (175°C) and continue baking for an additional 35-45 minutes, or until the apples are tender and the crust looks beautifully golden brown.
Step 9: Cool It Down
Once baked to perfection, let your pie cool for a bit before serving. This wait allows the filling to set, making for cleaner slices.
Serving Suggestions & Pairings
Serve your apple pie warm with a scoop of vanilla ice cream for an indulgent treat, or pair it with a dollop of freshly whipped cream. It also makes a delightful accompaniment to a cup of hot cider or coffee, perfect for any gathering.
Storage & Leftovers Guide
If you have any leftovers (though they’re unlikely!), store your apple pie at room temperature for up to two days, or in the refrigerator for up to five days. To revive the crust later, pop individual slices in a preheated oven for a few minutes until warm and flaky again.
Kitchen Wisdom & Success Tips
- Select a mix of sweet and tart apples for a more complex flavor; Granny Smith and Honeycrisp work beautifully together.
- To prevent a soggy bottom crust, make sure to drain any excess juices from the apple mixture before pouring it into the crust.
- If you don’t have an egg for the wash, a bit of milk will also add a nice shine to the crust!
Flavor Variations & Adaptations
Feel free to customize your pie! Add a dash of vanilla extract or a handful of raisins for extra flavor. You can even swap out some of the apples for pears for a delightful twist.
Reader Questions & Solutions
-
What type of apples are best for pie?
- A mix of sweet and tart apples like Granny Smith, Honeycrisp, and Fuji creates a balanced flavor.
-
Why is my apple pie soggy?
- Ensure you drain the apples well before filling the pie and bake at a high temperature to set the crust.
-
Can I freeze apple pie?
- Yes! You can freeze an unbaked apple pie for up to three months. Just label it and pop it straight into the oven when you’re ready.
-
How do I know when my pie is done?
- Check for a golden crust and bubbling juices in the slits of the top crust; both indicate it’s ready!
-
What can I use instead of butter?
- You can replace butter with margarine or a plant-based alternative for a dairy-free version.
Wrapping Up
There’s truly nothing like a slice of homemade apple pie to bring comfort and joy to any table. Through each step of the journey, you’ve not only created a delightful dessert but also made lasting memories. So gather your family around, serve a warm slice, and savor the love baked into every bite. Happy baking!
PrintClassic Apple Pie

A comforting classic apple pie with a flaky crust and warm cinnamon-spiced filling, perfect for autumn gatherings.
- Prep Time: 20 minutes
- Cook Time: 60 minutes
- Total Time: 80 minutes
- Yield: 8 slices 1x
- Category: Dessert
- Method: Baking
- Cuisine: American
- Diet: Vegetarian
Ingredients
- 6 to 8 apples, peeled, cored, and sliced
- 3/4 cup sugar
- 2 tablespoons all-purpose flour
- 1 teaspoon cinnamon
- 1/4 teaspoon nutmeg
- 1 tablespoon lemon juice
- 1 tablespoon butter, divided
- 1 package refrigerated pie crusts (2 crusts)
- 1 egg (optional, for egg wash)
Instructions
- Preheat the Oven: Start by preheating your oven to 425°F (220°C).
- Prepare the Apple Filling: In a large bowl, combine the sliced apples with sugar, flour, cinnamon, nutmeg, and lemon juice.
- Toss everything gently to ensure the apples are evenly coated.
- Roll out one pie crust and fit it into a pie dish.
- Pour the prepared apple mixture into the pie crust, arranging the apples for an even look.
- Dot the filling with small pieces of butter to add richness.
- Roll out the second pie crust and lay it over the apple filling.
- Seal the edges by crimping or fluting them with your fingers.
- Cut slits in the top crust to allow steam to escape while it bakes.
- Brush the top crust with a beaten egg for a golden finish.
- Place the pie in your preheated oven and bake for 15 minutes.
- Reduce the temperature to 350°F (175°C) and continue baking for 35-45 minutes.
- Let your pie cool for a bit before serving.
Notes
Serve warm with vanilla ice cream or freshly whipped cream. For storage, keep at room temperature for up to two days or in the refrigerator for up to five days.
Nutrition
- Serving Size: 1 slice
- Calories: 250
- Sugar: 15g
- Sodium: 150mg
- Fat: 12g
- Saturated Fat: 7g
- Unsaturated Fat: 5g
- Trans Fat: 0g
- Carbohydrates: 36g
- Fiber: 2g
- Protein: 2g
- Cholesterol: 70mg


