
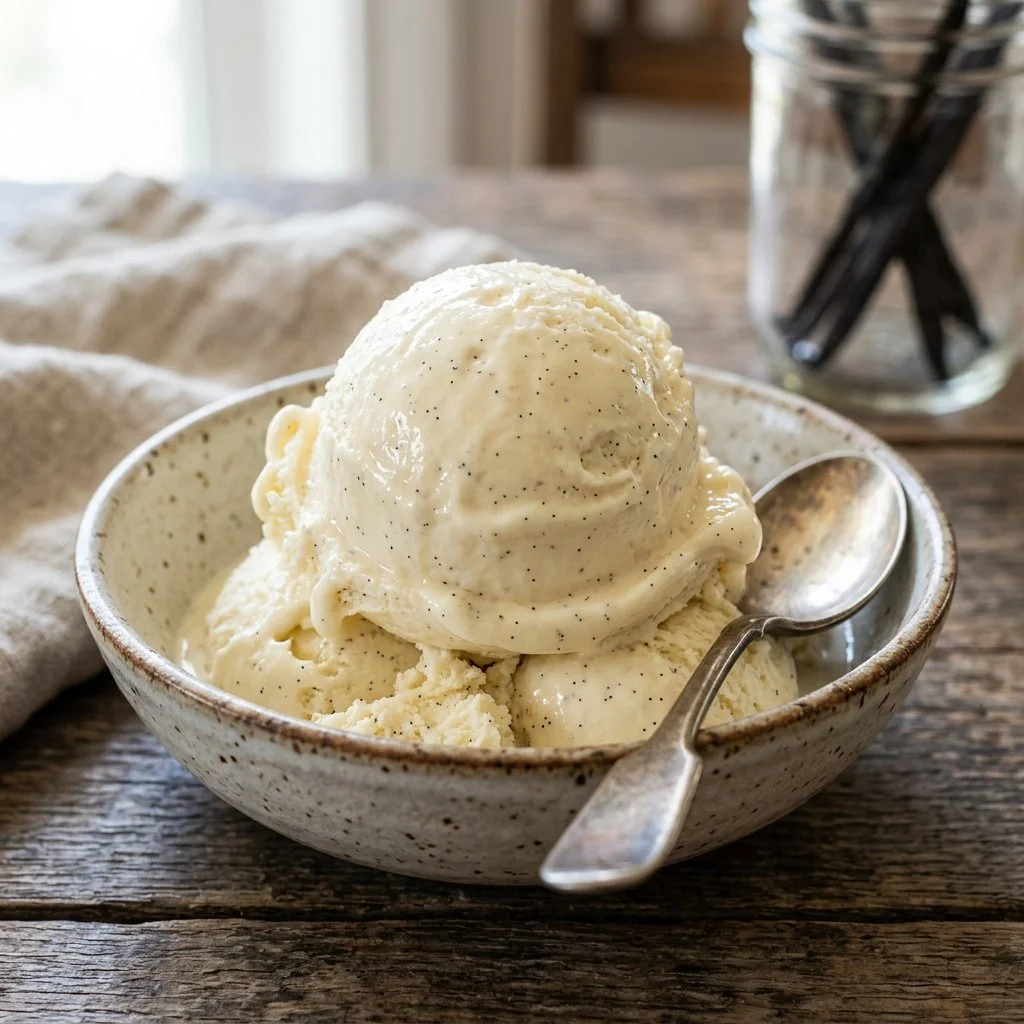
There’s something magical about homemade ice cream, isn’t there? As the summer sun pours in, I can’t help but reminisce about hot afternoons spent in my grandmother’s kitchen, where the air was fragrant with vanilla and laughter. I remember the sound of the ice cream maker whirring in the background, the anticipation building as we waited for a sweet creation that would cool us down and bring joy. Today, I’m excited to share a recipe that evokes those cherished memories—Homemade Vanilla Ice Cream. It’s simple, rewarding, and a perfect culinary adventure for anyone looking to make something special and delicious.
Recipe Timing
- Prep Duration: 10 minutes
- Active Cooking: 20 minutes
- Total Duration: 4 hours 30 minutes (includes freezing time)
- Portion Size: 6-8 servings
- Complexity: Simple
Nutritional Recipe
- Calories per portion: Approximately 250
- Protein: 3 grams
- Carbs: 23 grams
- Fats: 17 grams
- Fiber: 0 grams
- Sugars: 19 grams
- Sodium: 50 mg
Why You’ll Love This Homemade Vanilla Ice Cream
This homemade vanilla ice cream is more than just a dessert; it’s a labor of love that you can customize to your heart’s content. By mastering the classic vanilla base, you’ll unlock a world of possibilities. Whether enjoyed in a cone or dolloped over your favorite pie, its creamy, dreamy texture and rich flavor will have everyone begging for more. Plus, making ice cream at home is a delightful activity for friends and family. You’ll make lasting memories as you gather around the ice cream maker, eagerly awaiting that first scoop.
The Complete Cooking Journey
Imagine a quiet afternoon where the only sound is the gentle mixing of cream and sugar, the sweet aroma of vanilla wafting through your kitchen as anticipation builds. This recipe is not just about making ice cream; it’s about creating a moment, building connection, and relishing the sweet joys of summer. And the best part? It’s entirely customizable! Add chocolate chips, fresh fruit, or even crushed cookies for a special twist. Let’s embark on this ice cream adventure together, shall we?
Ingredients:
- 2 cups heavy cream
- 1 cup whole milk
- 3/4 cup granulated sugar
- 1 tablespoon pure vanilla extract
- 1/2 teaspoon salt
- Optional: 1 cup of mix-ins (like chocolate chips or fruit)
Method:
Step 1: Gather Your Ingredients
Start your ice cream journey by gathering all your ingredients. This makes the process smoother and keeps you organized.
Step 2: Whisk the Base
In a mixing bowl, whisk together the heavy cream, whole milk, sugar, vanilla extract, and salt until the sugar is dissolved. You want this mixture to be beautiful and frothy with that signature sweet scent.
Step 3: Prepare Your Ice Cream Maker
Pour the mixture into your ice cream maker. Follow the manufacturer’s instructions for churning. It’s essential to make sure the ice cream maker barrel is properly prepped and cold for the best results.
Step 4: Churn to Creamy Perfection
Churn the mixture until it’s thick and creamy. This process can take anywhere from 20 to 30 minutes, depending on your ice cream maker. It’s the most fun part, watching your liquid base transform into luscious ice cream!
Step 5: Add Mix-Ins (Optional)
If you’re looking to add some exciting flavors, now’s the time! Toss in chocolate chips, crumbled cookies, or fresh fruit during the last few minutes of churning. This adds a delightful surprise in every scoop.
Step 6: Freeze the Ice Cream
Once churning is complete, transfer the ice cream to an airtight container. Freeze for at least 4 hours or until firm. The freezing time is hard, but it will be worth the wait!
Step 7: Serve and Enjoy!
Finally, it’s time! Scoop out your homemade vanilla ice cream into bowls or cones, savoring every creamy bite. Enjoy the fruits of your labor!
Serving Suggestions & Pairings
Serve your ice cream alongside warm brownies, fresh fruit pies, or simply on its own. Drizzle with chocolate or caramel sauce to make it even more indulgent. Pair it with a buttery biscuit or layer it in a parfait with your favorite toppings for a real treat.
Storage & Leftovers Guide
Homemade ice cream can be stored in an airtight container in the freezer for about 2-3 weeks. To maintain its creamy texture, make sure the container is tightly sealed. If you happen to have any leftovers (though I doubt it), let it sit at room temperature for a few minutes before scooping for the best texture.
Kitchen Wisdom & Success Tips
- Ingredient Temperature: For a creamier texture, ensure your heavy cream and whole milk are cold when mixing.
- Churning Time: Remember, over-churning can turn your ice cream into butter, so keep an eye on it!
- Mix-In Ideas: Think beyond chocolate chips! Try crushed nuts, candy bars, or swirls of fruit puree for added excitement.
Flavor Variations & Adaptations
Feeling adventurous? Try infusing your basic vanilla with other flavors! Replace the vanilla extract with almond extract for a nutty twist, or add a few tablespoons of coffee for a delightful coffee ice cream. You could even swirl in some homemade caramel sauce for an indulgent treat!
Reader Questions & Solutions
-
Q: Why is my ice cream not freezing properly?
A: Ensure your ice cream maker is thoroughly chilled before use, and try not to exceed the manufacturer’s maximum fill line in your machine. -
Q: Can I use low-fat milk instead of whole milk?
A: You can, but this will affect the creaminess of your ice cream. Whole milk provides a richer texture that low-fat options cannot replicate. -
Q: How can I make my ice cream scoopable after freezing?
A: Let your ice cream sit out for about 5-10 minutes at room temperature to soften before scooping. -
Q: What can I use instead of sugar?
A: You could use natural sweeteners like honey or agave syrup, but the taste and texture will vary. If you’re using sugar alternatives, read the package for substitution ratios. -
Q: How do I prevent ice crystals in my ice cream?
A: Make sure your mixture is well-churned and fully frozen. Using high-fat cream and keeping it well-sealed helps prevent freezer burn and ice crystals.
Wrapping Up
Creating your very own Homemade Vanilla Ice Cream is as gratifying as it is delicious. It invites you to experiment, create, and share with those you love. So this summer, why not take a scoop of sweetness into your hands and celebrate the joy of homemade treats? Your family and friends will thank you, and you’ll create memories that will last a lifetime. So grab those ingredients and let the ice cream adventure begin!
PrintHomemade Vanilla Ice Cream
A simple and rewarding homemade vanilla ice cream recipe that evokes cherished summer memories.
- Prep Time: 10 minutes
- Cook Time: 20 minutes
- Total Time: 270 minutes
- Yield: 6-8 servings 1x
- Category: Dessert
- Method: Churning
- Cuisine: American
- Diet: Vegetarian
Ingredients
- 2 cups heavy cream
- 1 cup whole milk
- 3/4 cup granulated sugar
- 1 tablespoon pure vanilla extract
- 1/2 teaspoon salt
- Optional: 1 cup of mix-ins (such as chocolate chips or fruit)
Instructions
- Gather Your Ingredients
- Whisk the Base
- Prepare Your Ice Cream Maker
- Churn to Creamy Perfection
- Add Mix-Ins (Optional)
- Freeze the Ice Cream
- Serve and Enjoy!
Notes
For a creamier texture, ensure ingredients are cold. Avoid over-churning to prevent butter formation.
Nutrition
- Serving Size: 1 serving
- Calories: 250
- Sugar: 19g
- Sodium: 50mg
- Fat: 17g
- Saturated Fat: 10g
- Unsaturated Fat: 7g
- Trans Fat: 0g
- Carbohydrates: 23g
- Fiber: 0g
- Protein: 3g
- Cholesterol: 0mg


